Documentation
Under construction.
Getting Started
Under construction.
Hello E+
Excessiveplus is a Quake III Arena game modification.
Basic E+ installation
- remove any older E+ version from q3 (if you have it), it is fully enough to remove all .pk3 files from excessiveplus directory,
- installation, download and extract E+ to your quake3 main directory, located at Program Files (windows), or at home hidden directory .q3a (Linux).
Maps installation
- simply put all .pk3 (if map is zipped extract it) to yours quake3/baseq3 directory
Basic setup for newcomer
This will normalize your connection problems lags, smoothness game while moving, and brings some equality among players, enables enemy coloring and enemy models, normalizes your frame rate. So threes are couple suggestions:
- make simple .txt file and change extension to .cfg, name it as autoexec.cfg create it with wordpad as example, put it to your quake3/excessiveplus directory, this file is your config file, that way u never loose your config (this config is auto loaded at every quake3 start):
next put these lines to your config, and save it :
//made by anubis for excessiveplus quake3 mod, 20.08.2010
//put this file to ../excessiveplus/ directory
//uncomment if you need something more

// excessiveplus name, change your name in ""
seta xp_name "#C5#D8#C3#C5#D3#D3#C9#D6#C5^l^4#F0#EC#F5#F3^s^l^7^f^7.#CE#C5#D4"

// screen
seta cg_drawfps "1" // shows your fps
seta com_maxfps "125" // set average stable number of your fps
seta scr_conspeed "999" // console more speed ;D
seta com_introplayed "0" // off intro, faster startup

// custom resolutions example, uncomment the lines if you need custom
// seta r_customaspect 1
// seta r_customheight 1050 //1024
// seta r_customwidth 1400 //1600
// seta r_mode -1

// connection
seta rate "22022" // depends on server and your connection
seta snaps "40" // depends on server
seta net_noipx "1" // off we do not need that
seta cl_maxpackets "63" // set same or half, as your average maxfps
seta cl_nodelta "0" // can't remember, but you dont need it
seta cl_packetdup "2" // ensure s twice that you will get packet
seta cl_punkbuster "1" // enable punkbuster for security reasons
seta cl_allowDownload "0" // forbid download for security reasons

// mouse fix
seta in_dgamouse "1"
seta in_mouse "1"
seta in_subframe "1"
seta m_filter "0" //0-2, m_smooth 1 = m_filter 0, 1 is no filt.smooth.
seta m_smooth "1" //0-2, most Game responsive 1, 2

// other game releated
// seta xp_OnExit "xp_screenshotDefault" // takes autoscreenshot on exit
seta cg_fov "100" // default 90, wider perspective, try 140
seta xp_colors "42221" // custom model colors, rail1 head body legs rail2 (needs alpha skins)
seta xp_delagWeapons "15" // bitmask: delag all weapons (1 MG, 2 SG, 4 LG, 8 RG)
seta xp_enemyColors "2222" // sets green color to all opponents (needs alpha skins)
seta xp_enemyModel "tankjr/xp" // force opponents to use one model
seta xp_hud "hud3" // available huds from hud0 to hud7
seta xp_noChatBeep "1" // disable console chat beep
seta xp_screenshotDefault "$(rdate)_$(time)_$(map)" // screenshot naming setup
seta cg_deferPlayers "1" // prevents lag then someone is connecting
seta cg_drawTeamOverlay "2" // shows teammates locations on arena
seta com_hunkMegs "150" // preserve more ram to quake

// render
// seta r_subdivisions "33" // 1 to 999, 1-highest detail low fps, for weak PC's uncomment
seta r_finish "0" // sync ev.frame if 1 Improves response screeen/keyboard/mouse -1-2fps
seta r_picmip "0" // highest textures quality 0 - 9 lower blurry textures quality
You can try to download it from here, (if link does not work contact me).
Now startup quake3 excessiveplus.
Console, in game, opens with
"~" key.
So you can enter commands directly in game console like /rate 25000, if you entered all settings by hand then you must do /vid_restart to apply all of them.
Also you can try to setup your mouse sensitivity try different meanings for these:
sensitivity 1 // 1 to 99, mouse speed
cl_mouseAccel 3 // 0 to 99, mouse acceleration
You can minimize quake3 with
alt+enter (windowed mode), and then bring down console to aces your desktop.
Use /reconnect command if lost connection too server, or feels laggy problems.
To connect to some servers directly you can use /connect servers-IP-here
You can save your config by /writeconfig config-name
You can load you config by /exec config-name
And now lets get some action ;]
Here's some server list: http://www.excessiveplus.net/spider
Client
Under construction
Client Cvars & Commands
Excessive Plus has several new client cvars and commands, as well as some modifications to existing ones, which accounts for its many server side features. In this document you will find them all.
Variable list
com_maxfps
- Sets a cap of FPS that you Q3 client will not exceed. Maximum FPS is 125.
com_hunkmegs
- Sets a number of Megabytes (mb's) that your Quake 3 Client can use to load maps. Some maps need more memory. Maximum number is 128. Default is 56mb
r_displayrefresh
- Sets your Display Refresh rate in Quake III. Do not exceed the Display refresh rate your monitor can handle. If you do not know what Display refresh rate your monitor can handle, do not use this command.
cl_timeNudge
- This affects how your client processes the snapshots it receives.Normally the client compares one snapshot with the next and interpolates between the two.If you set this to a negative value, you can adjust the interpolation of snapshots to compensate for lag.The more negative timenudge you use, the more unsmooth other players will appear, but the less latency you will have.The hardcoded limit is between -30 and +30.You can use positive values of timenudge to affect snapshot interpolation with an opposite effect, making the game much smoother, although deliberately delayed.Timenudge only directly affects the latency of the incoming data and does not directly affect the data that you send to the server.
- A tip for using timenudge. If you are losing packets try adjusting timenudge until you get a thin blue line on your ping graph, at this setting it should give the feeling of a more smooth connection but just at the point where anymore nudge would be creating undesired prediction side effects and less timenudge, packetloss. Try to think of timenudge as a command which allows you to better sync yourself (when your connection is constantly bad) to a sever.
cg_cmdTimeNudge
cg_drawBBox
- Draws the enemy hitboxes on demos
cg_shadows
- Changes type of shadows: 0 - disable shadows; 1 - simple round shadows; 2 - figured shadows
cg_gibs
- Enables and Disables enemies blowing up and parts of them flying around
cg_drawrewards
- Enables and Disables the notification of Rewards
cg_marks
- Removes marks, bullet holes, scratches and weapon fire effects from all terrains. Increases FPS
cg_drawfps
- Enables and Disables a HUD text that shows you how much FPS your Q3 Client has
cg_projectileNudge
- set to your average ping (this means also that you may need to change this value after you change server, to maintain the best experience). Default value is 0.
cg_projectilenudge is the new method of reducing lag and is compatible with delagged gameplay. When set correctly it enables you to assess when incoming projectiles are going to hit you in spite of your lag, enabling you to dodge them. It should be set to your average ping time (not half your ping like cl_timenudge). This enables a client prediction algorithm also, but for projectiles only and not for targets so you can hit them with delagged hitscan weapons.
Note that it is possible to use cl_timenudge together with cg_projectilenudge, but calculating to which values you should set them together is not intuitive and therefor not very practical, and aiming and firing hitscan weapons becomes more difficult too because you have to take the cl_timenudge value into account and lead (or even trail) your targets.
cg_noprojectiletrail
- Enables and Disables smoke from rockets
scr_conspeed
- Changes speed of the Console. Maximum working number is "999".
cg_draw3dicons
- changes default 3D HUD icons (weapon, ammo, head) and puts instead of them 2d.
cg_centertime
- varies the number of seconds of center printed messages that block your visibility. All kind of messages eg. "You fragged xxx";"xxx joined xx team"; and other. "/cg_centertime 0" removes the messages completelly
cg_lagometer
- Enables and Disabled a animation in your HUD that shows your connection smoothness
name
- Changes your ingame name
xp_aspectRatio
- Fixes the aspect ratio of the HUD and HUD elements if the video ratio is not 4:3, for example if you use seta r_customaspect "1".
.
xp_colors
- Set
xp_corpse
- Controls corpses' behaviour
- Bitmask: 1- fade dead bodys into dark; 2 - fade frozen bodys of enemy team into dark; 3 - filter dead bodys
xp_country
- Set your country "GB" EN" "LT" etc.
xp_crosshairColor
- Changes your Crosshair color
xp_delagDemo
- Delags followed players on demos, so you can know better what was the player seing locally
xp_delagWeapons
- Bitmask: 1- Machinegun; 2 - Shotgun; 4 - Lightning; 8 - Railgun
xp_drawClientNum
- Shows clients numbers near by name
- Bitmask: 1- Chats; 2 - Obituary; 4 - Tourney scoreboard
xp_drawMouse
- Mouse cursor on the scoreboard which allows to choose players to spectate
xp_drawMVDWindow
- Toggles on/off the secondary window drawing on mvd playback
xp_drawNames
- Draws names of player when you point to him(only valid while demo or for team members)
xp_drawNotify
- Controls printing information on screen
- Bitmask: -1- use old (engine) notify; 0 - disabled; 1- draw chat; 2 - draw frags; 4 - draw killstreaks; 8 - everything else
xp_drawPing
- Shows your ping ploter
xp_drawScores
- Shows Scores as a part of your HUD
xp_drawSpeed
- Shows your Speed as a part of your HUD
xp_drawStats
- Shows your stats in your HUD
xp_drawTime
- Shows game time in your HUD
xp_drawWeaponSelect
- When you choose a weapon either by bind either by mouse scrolling by using the command it shows the Weapon grid and which weapon you selected
xp_enemyColors
- Changes color of all enemy models, "2112" numbers represents four colors
xp_enemyModel
- Changes all enemy models to the one you choose
xp_gunFov
xp_hud
- Enables and Disables your HUD (there are 1 to 7 presets)
xp_name
- same as /name , but uses special excessiveplus codes for font
xp_noBlink
- Enables and Disables fancy names blinking
xp_noBobbing
- Bitmask: 1- disables weapon bobbing animation; 2 - disables weapon switch animation; 4 - disables weapon firing knockback animation; 8 - disables damage kick
xp_noChatBeep
- Enables and Disables console chat beeps
xp_noMip
- Disables /r_picmip cvar for this functions(bitmask): 1 - Lightning bolt; 2 - Plasma projectile and explosion; 4 - Rocket explosion; 8 - Grenade explosion; 16 - Bullet explosion; 32 - Rail trail; 64 - BFG explosion; 128 - Blood explosion; 256 - Smoke puff; 512 - Shadow marks; 1024 - Wall marks
xp_noParticles
- improves perfomance of rocket and grenade explosions
xp_noRadioChat
- Enables and Disables radio voice chat sounds
xp_noShotgunTrail
- Enables and Disables shotgun trail ingame
xp_noSnow
- Enables and Disables Snow Animation ingame
xp_noVoiceChat
- Enables and Disables Voice Chat ingame
xp_oldGrenade
- Enables and Disables the new Grenade to the old one
xp_oldHitSound
- value of 0 enables damage-based hit tones; 1...5 - different hit tones
xp_oldScoreboard
- old style scoreboard(v1.16...v1.31?)
xp_onExit
- Put here a command, that will be executed on exit
xp_recordMessage
- Enables or disables on-screen demo recording message
xp_screenshotDefault
- Changes the default format of screenshot name, see below for the format:
$(rdate) 1999-12-02
$(date) 02-12-1999
$(time) 18-00-59
$(gametype) ffa, single, 1on1, tdm, ctf, rtf, 1fctf, ca, ftag, ptl
$(map) q3dm2
$(address) localhost-27960
$(servername) My-excessive-server
$(name) ExcessivePlayer
$(team) free, red, blue, spec
$(otherteam) none, red, blue
$(teamname) none, g_blueTeam, g_redTeam
$(otherteamname) none, g_blueTeam, g_redTeam
$(redteamname) g_redTeam
$(blueteamname) g_blueTeam
xp_specModel
- Enables or disables own model for spectating player
xp_startrecordDefault
- Changes the default format of record name, see below for the format:
$(rdate) 1999-12-02
$(date) 02-12-1999
$(time) 18-00-59
$(gametype) ffa, single, 1on1, tdm, ctf, rtf, 1fctf, ca, ftag, ptl
$(map) q3dm2
$(address) localhost-27960
$(servername) My-excessive-server
$(name) ExcessivePlayer
$(team) free, red, blue, spec
$(otherteam) none, red, blue
$(teamname) none, g_blueTeam, g_redTeam
$(otherteamname) none, g_blueTeam, g_redTeam
$(redteamname) g_redTeam
$(blueteamname) g_blueTeam
xp_teamSounds
- Bitmask: 0 - disabled; 1 - ctf sounds; 2 - score sounds
vid_restart
- Restarts video in your Quake 3 Client to successfully save changed settings or simply if you changed gamma or picmip.
Command list
away
- Moves you to "away" mode in Spectators List. Once you join back any team your kills and score will not be reset to 0 but will remain same as when you used "/away". Time will be you pre-away time + all the time you where away
+vstr, -vstr
- Executes a variable command
countries, locations
- These commands show you what Countries/locations are other players in.
drop
- drops weapon or item.
echo2
- same as /echo , but works for xp_drawNotify
help
- Shows you a list of available help
hud
- Customizable user ingame interface(health,armor bars,weapons,etc.)
ignore, mute
- Ignores or Mutes a concrete Player. To ignore or mute someone look up there ID by pressing TAB and the ID number. Works like -> "/ignore 0" or "/mute 0". 0 is just a example.
invite
- Invite someone to the locked team
joinword
- Join password to a locked team
lock
- Lock a team
messagemodeXP
- value of 1 - /say; 2 - /say_team; 3 - /say_spec
motd
- MOTD or "Message of the day". With "/motd" you can see the Message of the day on server
notready
- during a tournament or after a match this command sets your status as not read
players
- shows players network settings in console
ready
- during a tournament or after a match this command sets your status as ready
ref, referee
- command to be referee(refereePassword must be set on server)
say_spec
- by "/say_spec" only spectators can see what you say.
say_team
- by "/say_team" only your team-mates can see what you say.
scores
- shows scores
screenshotXP
- Makes screenshot.Use /screenshotXP [ <tga | jpeg> [ <format> ] ] - > also see xp_screenshotDefault
xp_screenshotDefault
- can take arguments like $(rdate) $(time) $(map) $(servername), and in config looks like seta xp_screenshotDefault "$(rdate)_$(time)_$(map)", will name it screenshot image with date time map name
speconly
- turn on spectator mode
startmvd
- starts recording public multiview demo(MVD), demo from all players in server
startrecord
- starts recording one following player demo
stats
- shows you your stats
stopmvd
- Stops MVD
teamready
- sets ready status to all members in team
timein
- same as ready then taken timeout
timeout
- stops, pauses game-play for a certain time
unignore, unmute
- removes ignore or mute on a player you have ignored or muted. To un-ignore or unmute someone look up there ID by pressing TAB and the ID number. Works like -> "/unignore 0" or "/unmute 0". 0 is just a example.
unlock
- unlock team if it was locked
wallhack
- works for rcon only in spectators mode
weaplast
- Added in Excessive Plus v1.0 (Mar 24 2004).Now removed
Communication
Excessive Plus has several features to improve your communication with your teammates, or just to spam on servers.
Chat Variables
There are some variables available that can be used in the normal, team or private chat messages.
$(health)
Current health.
$(armor)
Current Armor.
$(ammo)
Current ammunition for the currently held weapon.
$(location)
Returns the closest item spawn (only weapons, armors, powerups, holdable powerups and mega health). If there is no item spawn close to you, it will return the location as visible on the team overlay.
$(corpse)
The location you last died at.
$(attacker)
The player name who last hit you.
$(target)
The player name you last hit.
$(pickup)
The last item you took (only weapons, armors, powerups, holdable powerups and mega health).
$(item)
Like $(location) but reports only available items (no empty spawns) and includes dropped items.
$(itemCrosshair)
If there are more than one item close to you and you want to report about a specific item to your team. This will return the item closer to your crosshair.
$(friend)
The closest available team mate. Obviously only works for team games.
Examples:
/say_team Need support at $(location)! [H:$(health) A:$(armor)]
/say Next time I kill you, $(attacker)!!
/say Run while you can $(target)!
/say_team &gen_giveammo.wav Give me some ammo, $(friend)
Voice Chat
These are normal chat messages that additionally replay a sound to get the attention of other players. The sounds will vary depending on the sex of your model. You can colorize the following messages:
cover me
escort me
follow me
good shot
haha
i will hold this position
move
no
ok
take over this position
Usage: /say ^1Ha^3Ha
Radio Chat
These are normal team chat messages that additionally replay a sound to get the attention of your teammates. As with voice chats, the sound will depend on the sex of you model. You can colorize the following messages:
attack now
available tech
base is clear
base is overrun
cancel that
enemy fc is here
fall back and regroup
good work team
i have the quad
incoming attack
incoming quad
need defense
need escort
on defense
on offense
out of position
quad is up
ready
requesting base status
roger
standby to attack
waiting for the quad
Usage: /say_team Base is ^1OVERRUN
NOTE: Version 2.0a of Excessive Plus has a bug that disables radio chats and instead replays voice chats for both normal and team chats.
Q3F Radio Chat
These are the more complex type to set up. Basically, you can bind certain sounds with whatever message you want, being it normal, team or even private messages. The list of available sound files to replay are:
&def_depdisp.wav         Dispenser deployed.
&def_deppipe.wav         Pipe trap deployed.
&def_depsen.wav          Sentry deployed.
&def_dropflag.wav        Defend the dropped flag.
&def_fixsenty.wav        Repair our sentries.
&def_flag.wav            Defend our flag!
&def_flagdanger.wav      The flag is in danger.
&def_flagprimexit.wav    Flag outgoing primary exit.
&def_flagsafe.wav        Base secure.
&def_flagsecexit.wav     Flag outgoing secondary exit.
&def_iam.wav             I'm defending.
&def_incflag1.wav        Incoming flag.
&def_incflag2.wav        They're coming for the flag!
&def_incprimrte.wav      Incoming primary route.
&def_incsecrte.wav       Incoming secondary route.
&def_needsupp.wav        Requesting support.
&def_obj.wav             Defend the objective.
&def_wpt.wav             Defend the waypoint.
&gen_anytime.wav         Any time.
&gen_ceasefire.wav       Cease fire.
&gen_firehole.wav        Fire in the hole!
&gen_giveammo.wav        Give me some ammo.
&gen_gogogo.wav          Go go go!
&gen_goodbye1.wav        Goodbye.
&gen_goodbye2.wav        Goodbye.
&gen_halt.wav            Halt!
&gen_hello1.wav          Hello!
&gen_hello2.wav          Hello.
&gen_inpos.wav           In position.
&gen_isbasesec.wav       Is our base secure?
&gen_moveout.wav         Move out.
&gen_movepls.wav         Move please.
&gen_no1.wav             No.
&gen_no2.wav             No.
&gen_noprob.wav          No problem.
&gen_objcplt.wav         Objective complete.
&gen_objfld.wav          Objective failed.
&gen_oops.wav            Oops.
&gen_pass.wav            Pass.
&gen_reportin.wav        Report in.
&gen_sorry.wav           Sorry.
&gen_stop.wav            Stop!
&gen_unlucky.wav         Unlucky.
&gen_wait.wav            Wait.
&gen_waitord.wav         Awaiting orders.
&gen_watchfire.wav       Watch your fire.
&gen_yes1.wav            Yes.
&gen_yes2.wav            Yes.
&off_attobj.wav          Attack the objective.
&off_attsentry.wav       Attack the enemy sentry.
&off_attwpt.wav          Attack the waypoint.
&off_carrsupp.wav        Our flag carrier needs support.
&off_coverme.wav         Cover me.
&off_defhvy.wav          Enemy defense heavy.
&off_deflight.wav        The enemy defense is light.
&off_dephe.wav           Heavy explosive deployed.
&off_flagget.wav         Get the enemy flag.
&off_flaggive.wav        Give me the flag.
&off_flaghave.wav        I have the enemy flag.
&off_flagtake.wav        Take the flag from me.
&off_imatt.wav           I'm attacking.
&off_needsupp.wav        I need reinforcements!
&off_spotpipe.wav        Pipe spotted.
&off_spotsen.wav         Sentry spotted.
&tap_alright.wav         All right.
&tap_aw.wav              Awww.
&tap_goaway.wav          Go away.
&tap_goodgame1.wav       Good game.
&tap_goodgame2.wav       Great game.
&tap_myflag1.wav         My flag.
&tap_myflag2.wav         My flag, you can't have it.
&tap_nicecapture1.wav    Nice capture.
&tap_nicecapture2.wav    Nice capture.
&tap_nicemove1.wav       Nice move!
&tap_nicemove2.wav       Nice move!
&tap_niceshot.wav        Nice shot.
&tap_sneakybastard.wav   You sneaky bastard.
&tap_thatsucks1.wav      That sucks!
&tap_thatsucks2.wav      That sucks!
&tap_thegreatest.wav     We're the greatest!
&tap_wellplayed1.wav     Well played.
&tap_wellplayed2.wav     Well played!
&tap_werock1.wav         We rock!
&tap_werock2.wav         We rock!
&tap_yourmine.wav        You're mine!
&tap_yourock.wav         You rock!
Usage: /say &tap_sneakybastard.wav You sneaky bastard!
Disabling messages
You can disable all of these fancy features with the client cvars xp_noVoiceChat for voice chats, or xp_noRadioChat for radio chats. Use xp_noChatBeep to disable the chatbeep coming after each message.
However, if you don't want to disable them, but there is a chat spammer on the server you would like to ignore, you can use the /ignore (alias /mute) client command. This command accepts one parameter, which can be:
- The ID of the client you want (you can see this ID printed on the scoreboard, or in the output of the
/playerscommand). - The string
red,blueorspecto mute all members of the specified team. - The string
allto mute everyone in the server.
Mutes will stay for the session. You can add something like unmute all to the xp_onExit cvar to unmute them at the end of the map.
Alternatively, to mute everyone on the server, you can just disable the printing of chat messages, by setting the right bits on the xp_drawNotify client cvar.
Demos
Simple demos
Excessiveplus demos are recorded and played from excessiveplus\demos directory.
Config below contains example key binds for recording demos and useful while playing them.
If you like it you can just copy and paste it into your own config file.
This config uses arrow keys so change them if these keys are already used in your config.
// DEMO PLAYER™ by Shudder

bind UPARROW "vstr recX"            //record / stop record
bind DOWNARROW "timescale 0"        //pause demo
bind RIGHTARROW "+vstr time3 time2" //play (fast forward x3 when pressed)
bind LEFTARROW "+vstr time1 time0"  //slow x2 (x10 when pressed)
bind END "vstr mvdX"                //record / stop MVD

set recX "vstr recON"
set recON "startrecord; set recX vstr recOFF"
set recOFF "stoprecord; set recX vstr recON"

set mvdX "vstr mvdON"
set mvdON "startMVD; set mvdX vstr mvdOFF"
set mvdOFF "stopMVD; set mvdX vstr mvdON"

set time0 "timescale 0.5"
set time1 "timescale 0.1"
set time2 "timescale 1.0"
set time3 "timescale 3.0"

seta xp_startrecordDefault "$(name)_$(rdate)_$(time)_$(map)_$(servername)"
//Demo will be named using variables

seta sv_fps 125
//When recording demo on localhost you need to put your com_maxfps value here
//for smooth playback.
To watch a demo from file you have a few options:
1) place it in your excessiveplus\demos folder, start Q3 and run it from menu (DEMOS).
2) use external program to run it for you with double click like seismovision or other (?)
3) use simple batch file to open .dm_68 file type:
@echo off
cd /D %0\..
copy %1 "excessiveplus\demos\temp.dm_68" /Y
start quake3.exe +set fs_game excessiveplus +timescale 0 +demo temp.dm_68
Multi view demos (MVD)
Those demos are best for FWs or CWs. Recording makes one huge demo with all playing clients on server (while watching you can change and spectate everyone you like, like in real game).
Ref's and rcon's can make mvd's as they want and need, even if MVDs are forbiden for clients by server admins. In example config shown above you can record MVDs with END key.
...
Make avi videos in Quake3
Shortly: Record simple demo. Convert it to tga frames. Merge them to avi, using free software.
Convert the Q3 demo to .tga frames, make sure you have enough free diskspace, a long demo can easily eat up a few GB of data. Bring down the console and type: cl_avidemo 25, to record in 25 fps.
Start recording frames for you Quake 3 video, by typing demo demo1
Sit back and relax while the frames are beeing rendered. Setting cl_avidemo 0 will make demos run normal again.
When it's done, quit Quake 3 and you should find your recorded frames in the "\screenshots" directory as .tga files.
note: Quake 3 will output images in the same size as your Q3 screen resolution, a tip to speed up frame rendering of your video is to set it to low, for example 320x240.
Marge your frames into an .avi video
Download this freeware program:
pjBmp2Avi.zip or check out Quake Video Maker if you wanna make more advanced movies.
- Start "pjBmp2Avi.exe" and select the path to your demo's screenshots folder in the directory field.
For example: "\screenshots".
- Change the file option from BMP to TGA. Now you should see a list of all the screenshots in the "files" field.
- Go to "Output"-options and select path and name of the avi you wish to create.
For example: "c:\film_time\my_quake_3_movie.avi"
- Click the create button. An select a video codec when prompted, click OK and the program will compile your .tga files to an avi.
- Poke your Orb action figure in the eye, practice sweeping moves with you mouse or come up with any other fun way to spend your time while your Quake 3 avi video is compiling. The window closes (hopefully) and you're done! Grab some snacks and sit back and watch your first Quake 3 movie!
Q3 avi making by Fredrik Olsson 05-08-06 20:38,
Thanks to Bluehair on Doom3Files for suggesting Quake Video Maker
HUDs
Under construction.
You can highly customize the appearance of your HUD by the so called hud files.
The /hud your_hud_name command will load the file excessiveplus/hud/your_hud_name.cfg.
Note: There is the special default hud to disable the whole customizable HUDs.
So the command /hud default will disable and fallback to the default hud defined in the code.
To get your preferred HUD loaded automatically you can set the xp_hud variable in your config file.
Note that the /hud command will also set this variable for you.
Check out the great SuperHud Editor. It provides a visual editor, reducing the creation of a new HUD to a few mouse clicks.
Syntax
The syntax has been derived from CPMA, so most HUDs should load just fine.
# single-line comment
// single-line comment
/* multi-line comment */

NetGraph {
	rect 592 432 48 48
	bgcolor 0.25 0.25 0.25 0.25
	fill
}

NetGraph { rect 592 432 48 48; bgcolor 0.25 0.25 0.25 0.25; fill; }
Differences
There are some differences compared to CPMA.
- All elements are optional. Loading an empty file will result in an empty screen.
In contrast, CPMA draws some elements even if not defined, probably the most noticeable one would be
Console. - We have a flexible z-layer. Elements defined first will be drawn first, thus
PreDecorateandPostDecorateare just the same.If you run into problems with your existing HUDs and overlapped elements, just change the order.
Such fixed HUDs will load fine in both Excessive Plus and CPMA. - Elements can be defined multiple times and each appearance will be drawn. For example you can display your health two or even ten times all over the screen, if you fear the death.
- Several elements can be disabled by the default variables like
cg_drawFPS, even theDraw3Dproperty can be overwritten by/set cg_draw3dIcons 0.Of course you can only toggle the display if the element is actually defined by the hud file. If there is no
FPSdefined, you cannot display the FPS with/set cg_drawFPS 1. - We have new properties not available for CPMA, namely:
Anchors,ParamandVerticalBar.
Properties
Note: All sizes, positions and drawing is done in an virtual 640x480 box and then scaled to your actual screen resolution.
Anchors FlagsDefines to which directions the element will be anchored relative to the drawn screen. This property will be applied when
xp_aspectRatiois enabled, which allows the HUD to not look stretched on non-4:3 resolutions. The possible flags are:1top
2right
4bottom
8leftFlags can be combined. For example, the default value of
15(which is 8 + 4 + 2 + 1) will anchor the element in all directions, which means that CPMA HUDs will look stretched, just like ifxp_aspectRatiois disabled.Angles Pitch Yaw Roll [ Pan | -Rotate ]Used to alter the display of a
Model. The fourth value is optional, if given it will either pan or rotate the model, depending on the algebraic sign (positive or negative).BGColor Red Green Blue AlphaDefines the background color for the element, valid values are
0..1. In combination withRectandFillthis will fill the area with the color.Color Red Green Blue AlphaorColor T | EDefines the foreground color for the element, valid values are
0..1. Icons andImageproperties will use this color.There are two special colors
TandE, they will represent the colorsredorbluedepending on your current team.Note: Define
BGColorto control the alpha of these special colors.DoubleBar [ 0 | 1 ]Makes the elements
StatusBar_ArmorBar,StatusBar_AmmoBarandStatusBar_HealthBaruse two lines instead of one.Note: If optional parameter is omitted it will default to
1.Draw3D [ 0 | 1 ]Will force the display of a 3d model. This can be overwritten by
/set cg_draw3dIcons 0Note: If optional parameter is omitted it will default to
1.Fade Red Green Blue AlphaIf both
FadeandTimeare defined, the element will linearly fade fromColorto this.Fill [ 0 | 1 ]Will fill the area defined by
RectwithBGColor.Note: If optional parameter is omitted it will default to
1.Font fontnameDefines the font for an element. If omitted
xpwill be used.xpis the default Excessive Plus font
numberssupports only numbers, no letters
uiis the font used by Quake 3 UI
baseq3will use the old Quake 3 fontCompatibility mode:
cpma,sansmanwill bexpwithTextStyle 4(lite)
idblockwill benumbers
idwill bebaseq3
threewavewill bebaseq3withTextStyle 8(outline)Any other fonts will output a warning and the default font will be used instead.
Note: It is highly suggested to use font
xpfor elements that can contain player names, because Excessive Plus allows highly customized names with bold/lite styles and special characters not present in other fonts.FontSize PointSizeorFontSize Width HeightThe default Excessive Plus font is already aspect-adjusted and generally looks best if you just specify the
PointSize. It is suggested to use a distinctWidthandHeightfor all other fonts, withHeightbeing 25-50% larger thenWidth.Note: Negative values can be used to create mirrored text.
Image "path/to/image_or_shader"Displays the image in the area defined by
Rect. You can use any image or shader available in a PK3. IfColoris present, it will colorize the image.This can also be used to load a skin for a
Model, just point the path to a .skin file.Note: On a
sv_pureenabled server you can only use images available in the PK3s the server provide.Model "path/to/model.md3"Displays a 3d model in the area defined by
Rect. A specific skin can be loaded for that model with theImage "path/to/skin_name.skin"property.Monospace [ 0 | 1 ]By default, all fonts are proportionally spaced. Meaning that an "i" takes up less room than an "m". Use this to get the old Quake 3 behaviour but generally this is not suggested.
Note: If optional parameter is omitted it will default to
1.Offset X Y ZChanges the offset of a
Modelalong the X Y Z axis.Param Value1 [ Value2 [ Value3 [ Value4 ] ] ]Up to four special parameters for some elements.
Rect X Y Width HeightDefines the position and size of an element.
Note: Elements and especially
Imagecan be mirrored using negativeWidthorHeightvalues.Text "some text here"Will output the text in the area defined by
Rect. Currently only supported byPreDecorateandPostDecorate.TextAlign L | C | RJustify the text either left, centered or right within
Rect.Note: In combination with some elements, this will define the element's position rather then it's text.
TextStyle Flags1text will have a drop shadow
2ignores inline color codes and forces color defined by theColorproperty
4forces a text to be "lite". Only works in combination with thexpfont
8text will have an outline shadowFlags can be combined e.g.
TextStyle 6will be 4 (lite) + 2 (force color).Time IntervalDefines how long the element will be displayed in milliseconds.
VerticalBar [ 0 | 1 ]Makes the elements
StatusBar_ArmorBar,StatusBar_AmmoBarandStatusBar_HealthBarbe vertical instead of horizontal.Note: If optional parameter is omitted it will default to
1.
Elements
!DefaultThis is a helper element and will not be drawn. Once defined, all followed elements will inherit properties from this element. You can reuse this element as often as you want.
PreDecorateandPostDecorateEmpty elements that can be used to draw decoration like separator bars, static
Text, images etc.Note: Because HUDs have a dynamic z-layer, both elements are the same and are just there for compatibility reasons. The draw order is defined by appearance order in the file.
AmmoMessage"LOW AMMO WARNING" and "OUT OF AMMO" message. Display can be toggled by
cg_drawAmmoWarning.AttackerIconIcon of the player who last attacked you.
Timecan be used.AttackerNameName of the player who last attacked you.
Timecan be used.Chat1tillChat8Display up to eight lines of player chats.
Timecan be used.Note: This can prepend the client number, depending on
xp_drawClientNum.ConsoleReplacement for the engine notify console.
Timecan be used. Display can be toggled withxp_drawNotify.FlagStatus_NMEStatus of the enemy flag in CTF gametypes.
Note: Use
Color Eto get aredorblueflag, depending on your current team.FlagStatus_OWNStatus of your own flag in CTF gametypes.
Note: Use
Color Tto get aredorblueflag, depending on your current team.FollowMessage"Following <PlayerName>" message. Obviously will only display when following a player while spectating.
FPSFrames per second. Can be toggled by
cg_drawFPS.FragMessage"You fragged <PlayerName>" message.
Timecan be used.GameTimeDisplays the game timer. Can be toggled by
cg_drawTimer.Note: The last 60 seconds will display milliseconds while overtime will change color to cyan.
GameTypeDisplays the current gametype like "Freeze Tag" while spectating or during warmups.
ItemPickupName of the item you've just picked up.
Timecan be used.ItemPickupIconIcon of the item you've just picked up.
TimeandDraw3Dcan be used.NetGraphDisplays your net graph or lag-o-meter. Can be toggled by
cg_lagometer.NetGraphPingDisplays your current ping, based on the net graph. Can be toggled by
xp_drawPing.PlayerSpeedYour current speed on the X-Y-axis in units per second. Can be toggled by
xp_drawSpeed.Powerup1_IcontillPowerup4_IconPowerup icons.
Draw3Dcan be used.Note: CTF gametypes will display the flag in
Powerup1_Iconwhile you hold it.Powerup1_TimetillPowerup4_TimePowerup time left in seconds.
RankMessage"1st place with 12" message.
Timecan be used.Score_LimitFraglimit, Roundlimit or Capturelimit. Can be toggled by
xp_drawScores.Score_NMEEnemy score. Can be toggled with
xp_drawScores.Note: Use
Color Ein combination withFillto get aredorbluebackground, depending on your current team.Score_OWNYour score. Can be toggled with
xp_drawScores.Note: Use
Color Tin combination withFillto get aredorbluebackground, depending on your current team.SpecMessageHelp message for spectators, explaining the keys or informing about your thaw status in Freeze Tag.
StatusBar_AmmoBar,StatusBar_ArmorBar,StatusBar_HealthBarCurrent ammo/armor/health in bar form. For a single bar, it will get full when it reaches the hard limit.
DoubleBarcan be used to get two lines instead of one, representing the soft and hard limits.TextAlignwill change the alignment of the whole bar andImagecan be used to customize it even further. Can be toggled bycg_drawStatus.This element accepts an additional
Param, which can be a combination of the following flags:
1single bar will behave like the second bar ofDoubleBar
2single bar will get full when it reaches the soft instead of hard limit
Combining those flags on different bars can achieve some fancy effects. Seehud/qlive_snippet.cfgfor an example.Note: If
Coloralpha is 0, flexible color will be used.Redfor critical,orange/yellowfor normal andwhitefor over limit values.StatusBar_AmmoCount,StatusBar_ArmorCount,StatusBar_HealthCountCurrent ammo/armor/health in numeric form. Flexible colors are enforced. Can be toggled by
cg_drawStatus.StatusBar_AmmoIcon,StatusBar_ArmorIcon,StatusBar_HealthIconCurrent ammo/armor/player icon.
Draw3Dcan be used. Can be toggled bycg_drawStatus.Note: If both
ImageandModelis ommited inStatusBar_HealthIcon, your current model will be used.TargetNameCurrent crosshair target's name. Can be toggled by
cg_drawCrosshairNames.TargetStatusCurrent crosshair target's status, only available for team members. Can be toggled by
cg_drawCrosshairNames.TeamCount_NMEPlayers alive on enemy team, only for Freeze Tag and Clan Arena. Can be toggled by
xp_drawScores.TeamCount_OWNPlayers alive on your team, only for Freeze Tag and Clan Arena. Can be toggled by
xp_drawScores.TeamIcon_NMEDefaults to
red/blueSarge icon, depending on your team. You can use anyImageorModel.TeamIcon_OWNDefaults to
red/blueSarge icon, depending on your team. You can use anyImageorModel.Team1tillTeam8Teamoverlay for up to 8 team members. Can be toggled by
cg_drawTeamOverlay.TextStylewill change alignment for the whole element.Note: The column design will be kept, no matter if
Monospaceis set or not. Generally it will look better without.VoteMessageWorldCurrent vote text.
Note: Votes can be called at the end of a map, while the scoreboard is displayed. A position should be taken to work for both, in-game and scoreboard.
WarmupInfo"Waiting for players", "Warmup", "Starts in: X" etc.
WeaponListThe weapon list has some special settings that differ from the rest.
The
WidthandHeightare for each weapon, not the total.
TextStylecan be used to have a horizontal or vertical weapon list.
Colordefines the color for your current selected weapon andFillwill show ammo for weapons you do not have.Note: The list will wrap at the bottom of the screen for both vertical styles. This way you can get a multi-column list.
Matchmode
Under construction.
Names
In Excessive Plus you can use extended control characters to have colored names with special effects.
The main idea was taken from the popular mod 'OSP'.
The easiest way to create colored names is to use XP Qname 2.0 found here credits to  and all who helped make it, for a quick recap on how to set it up read comment 127 by
Of course, you can disable all effects by using xp_noBlink.
Characters
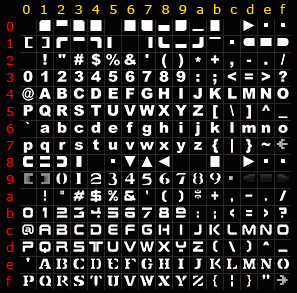
From the Character table, you can use different fonts and other characters to make unique names (tags).
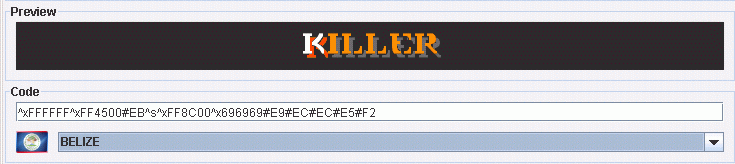
For example, both of these codes will produce the word WASP in a different way:

#D7#C1#D3#D0
/seta xp_name "#D7#C1#D3#D0"

#F7#E1#F3#F0
/seta xp_name "#F7#E1#F3#F0"
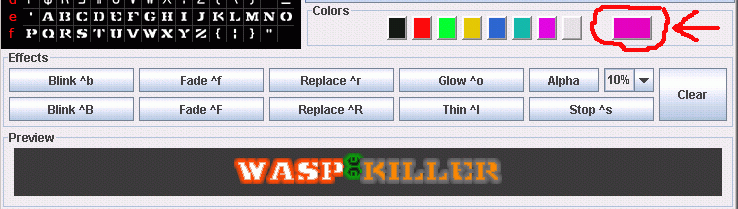
Colors
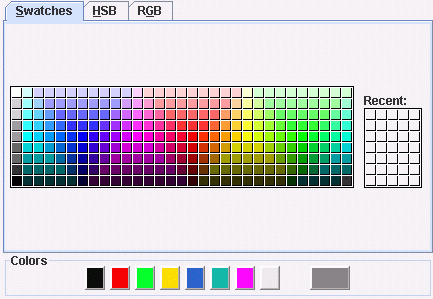
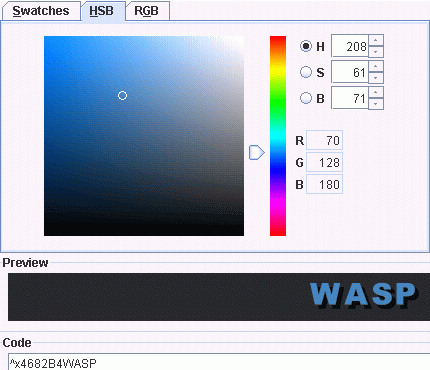
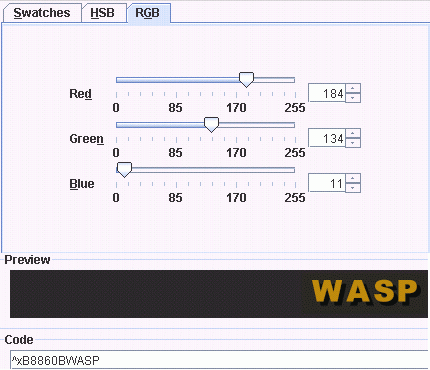
To have a colored name you can use the the basic Color line, or the more sophisticated Swatch, HSB, and RBG Tabs, or manually paste hex color codes from your favorite color picker/photo editor into the Code line.
Example, using the basic Color line (8 colors only) would produce the following code:
^0 - makes a text black.
^1 - makes a text red.
^2 - makes a text green.
^3 - makes a text yellow.
^4 - makes a text blue.
^5 - makes a text aqua.
^6 - makes a text fuchsia.
^7 - makes a text white.
So ^1WASP will become  and
and ^1W^2A^3S^4P will become  .
.
The HSB (Hue, Saturation, Brightness) and the RBG (Red, Green Blue) tabs allow you to have exact colors (examples, SteelBlue via the HSB tab and DarkGoldenRod via the RGB tab).
Effects
The Effects section includes several text altering attributes like blinking, fading, glowing and others.

Blinking
To make text blink select the effect button or use:
^b - makes a text blink at the first half.
^B - makes a text blink at the last half.
For example ^bte^Bst will become  .
.
Fading
To fade text select the effect button or use:
^f - will fade out a text and fade in again.
^F - will fade in a text and fade out again.
For example ^fte^Fst will become  .
.
Replacing
To replace text select the effect button or use:
^r - makes a text display at the first half.
^R - makes a text display at the last half.
For example ^rte^Rst will become  .
.
Foreground and Background Colors
You can improve the appearance of your name (tag) by using Foreground and Background Colors.
Simply place two (2) consecutive colors followed by text or symbols.
The text/symbol will use the 1st color (the foreground color) and the 2nd color (the background color) will be a shadow outline.
Hint: Look up the concept of Color Opposites to improve your efforts. If you use a program like Photoshop or the Gimp you can select the inverse of your color to have a background that will compliment your foreground color.
For example:

/seta xp_name "^7^1#C4#CD#DA^s^0^1#88^s^7^1#8D^s^0^4#F0#F2#E5#E4#E1#F4#EF#F2"
Glowing Text
You can add a glowing effect to your name (tag) for that Alien effect by using ^o or selecting the effect button.
For example, here is the name tag above with Glow on the player name:

/seta xp_name "^7^1#C4#CD#DA^s^0^1#88^s^7^1#8D^s^0^4^o#F0#F2#E5#E4#E1#F4#EF#F2"
Thin Text
If you are using lots of Capital letters, you may find it useful to use the Thin effect to reduce the width of your name (tag). To invoke the Thin effect use ^l or select the effect button.
For example, here is the name tag above with the Thin effect on everything:

/seta xp_name "^7^1^l#C4#CD#DA^s^0^1^o^l#88^s^7^1^l#8D^s^0^4^o^l#F0#F2#E5#E4#E1#F4#EF#F2"
Alpha Blending
To alter the transparency of text or symbols select the effect button or use:
^a1 - makes a text 10% visible.
^a2 - makes a text 20% visible.
^a3 - makes a text 30% visible.
^a4 - makes a text 40% visible.
^a5 - makes a text 50% visible.
^a6 - makes a text 60% visible.
^a7 - makes a text 70% visible.
^a8 - makes a text 80% visible.
^a9 - makes a text 90% visible.
For example ^a2t^a4e^a6s^a8t will become  .
.
Team Colors
While there is no button for this option, you can have your name change colors depending on your team:
^t - will be replaced by your current team color.
For example te^ts^7t will become on team blue  , team red
  ,
,
as spectator  and anything else
  .
.
Stop all Effects
To stop all effects from continuing past a certain point select the effect button or use:
^s - stops all effects.
Examples

/seta xp_name "^r^1^4*^R^4^1*^s ^f^0^7POLICE ^s^r^4^1*^R^1^4*"

/seta xp_name "^r^f^x77C818apple^xA5CC76juice^s^R^f^x2C7EE4blue^x76A9E7shift"

/seta xp_name "^0^r#1B#13#02#14^R#0A#08#1E#14^s^3test^0^r#12#02#13#1B^R#12#1E#08#0A"
xp_noBlink
To add via the console type: /set xp_noBlink 0
To add manually to your config: seta xp_noBlink "0"
Disables all fancy name effects, where:
0 = xp_noBlink is disabled
1 = xp_noBlink will disable all effects.
2 = xp_noBlink will disable all effects and draw everything in white color.
3 = xp_noBlink will disable all effects, draw all names in white color and make the console text also white.
E+ 1.03 Name Tag Conversion
If you played the previous version of Excessive Plus (version 1.03) you will notice that your name Tag does not display correctly anymore.
However, there is an easy way to make it compatable with Excessive Plus 2.0a. Simply copy the entire line from your old configuration to a new text file. Remember to save the file with a .cfg extension. Then, from XP Qname, CLICK "File" then "Open" and locate your config file.
For example, here is an old name tag about to be converted to E+ 2.0a style.

Here is the converted tag in Xp Qname.
Either copy and paste the converted code or save the new code and optionally a Country Flag into a new config file. To do so, simply CLICK "File" then "Save or Save As" depending on whether you want to overwrite the original config or create a new config file.
Here is the resulting config file with the new tag and country flag.

Note that E+ 2.0a uses a new client variable (cvar) "xp_name" instead of the old Q3 cvar "name". Consequently, if you later decide to edit the file, remember to modify the line with "seta xp_name" not "seta name".
Also, if you open an old name tag and the result is garbage then use a different text editor. My preferred editor "NotePad++" often had problems but Xint and EditPad Lite worked fine.
GIF and Preview Options
You can toggle the Preview between "16x16" and "32x32" sizes. To do this, CLICK "Options" and select the size that you wish to display.
Note, this only affects Preview and Saved Gif files. It will not change how your name tag displays in Quake III or OpenArena.
The name tags below are the same. The one of the left was displayed in 16x16 preview and the one on the right was displayed in 32x32 preview.

![]()

Besides toggling the Preview size, you can change the Preview and Saved GIF quality by CLICKING "Options" then "Gif Quality" and selecting the quality. Please note that you can also change the background of the Saved GIF either before or after you have entered the code. The background will not show up in the Preview but it will in the Saved GIF.
To save your name tag as a GIF, CLICK "File" then "Save As GIF".
The name tag on the left was saved as a 16x16 GIF and the one on the right was saved as a 32x32 GIF.

![]()

The 1st image below shows the button in XP Qname which will indicate the background color of your Saved GIF. Note, the Preview background did not change. The 2nd image shows the Saved GIF.

==============================================================================
Document Name: XP Qname HTML User Guide v1.1
Author: WaspKiller
Date: January 2010
Notes: This document used the format and some text
and images from the E+ 1.03 Qname User Guide.
==============================================================================
Server
The server-side options and configurations are very powerful. In this section you will find the documentation of all server-side features.
Bans System
Set the xp_bans "bans.txt" variable to the file where your ban list is. The ban system's syntax has some similarities to the config file syntax. If you prefer old banning system, then you can still use /rcon addip <ip-mask> and /rcon removeip <ip-mask>.
You can edit the file directly and add or remove the bans by yourself. Additionally, the /rcon ban group of commands modify this file directly and add the banning information to it. However, to remove the bans the file must be manually edited.
The syntax is described in the next example:
Name {
    "*yourname*" {        // ban all who have 'yourname' in their names
        IP: 92.18.0.4     // allow if ip match!
        Password: "test"  //    or if password!

        Reason: "Sorry, 'yourname' is a protected name!"
    }

    // for "^1 " names
    " " { Reason: "Please use a name!" }
}

IP {
    172.23.3.56 {        // ban this ip
        Name: "test*"    // but allow if the name begins with 'test'

        Reason: "Dude you are not test!"
    }

    207.46.* { Reason: "Microsoft isn't allowed!!" }
}
Configuration System
Excessive Plus is very customizable. You can create your very own personal settings, change the weapon behavior, the gameplay, items, nearly everything to fit your needs. All these settings are saved in configuration files inside the conf/ directory, but their format is quite different from normal q3config files, so they can't be executed with the /exec command.
You can also use the pre-made configurations inside the conf/ directory.
To load a configuration, use /load yourconfig.cfg or if you are admin of a remote server /rcon load yourconfig.cfg.
Alternatively, you can set the xp_config server cvar and the config will be loaded on map change.
If there are errors while loading the file, then those errors will be printed on the console and will be visible only if you are testing in local server or the config has been loaded with with an rcon console. Additionally, if the error happens on the parsing stage, it corresponds to a syntax error, and the execution of the file is aborted and default.cfg is loaded instead.
Note: The following configurations are static and cannot be changed, to modify one of these you'll need to copy or rename it!
baseq3.cfg, default.cfg, excessive1.cfg, excessive2.cfg, excessive3.cfg, excessive4.cfg and excessive5.cfg.
Syntax overview
The syntax for the configuration system has been completely reimplemented since 1.03. In its simplest form, you can just modify the value of a bunch of configuration options, like the following:
key1 = 1;
KEY1 = 1;
k E y 1 = 1;

topic1->key3 = 3;
topic1 { key3 = 3; }
t o p i c 1 -> key3 = 3;

exec("quake_command");

$quake_cvar = "10";
exec("set quake_cvar 10");
Semicolons ; at the end of sentences are mandatory, but white spaces are ignored, so multiple expressions and sentences can be specified on the same line. Also, everything after double slashes // until the end of the line is a comment and is ignored. Additionally, an slash followed by an asterisk /* indicates the start of a comment, which can be spread across multiple lines until an asterisk followed by an slash */ is found.
The key names are configuration options, which can only be accessed from inside the configuration system and are not available as quake cvars. This greatly reduces the load of having lots of cvars to configure the game. Key names are case insensitive, and are also insensitive to spaces on it.
When several options are related, it's common to find them grouped inside topics or categories. To modify an option inside a category, you can access it directly by writing the category name, followed by the arrow operator -> and the key name, or alternatively you can start a block after the category with brackets { } and access multiple keys directly inside that bracket without prefixing the category name.
When an identifier begins with a dollar sign $, it's interpreted as a quake cvar, and can be used either to access its value or to set it.
To execute commands, you have to use the exec function and add the command as a parameter.
Constants
Constants are a way to encapsulate values with identifiers, so the expressions become self documenting. Its usage is optional, but it greatly increases the readability of the code. For example, consider the following example:
$xp_unlagged = 204;
$xp_unlagged = WP_MACHINEGUN | WP_SHOTGUN | WP_LIGHTNING | WP_RAILGUN;
These two sentences are equivalent, but clearly the second one is more understandable. The pipes | are or operators and they are very useful for bitmask values, so in the second line it is easily noticeable that unlagged is being enabled only for hitscan weapons.
Most of the constants are listed (and explained when necessary) in the Available Options section, so we will only list the missing ones:
VERSION- Excessive Plus short version string.- Gametype constants:
GT_FFA              // Free For All
GT_TOURNAMENT       // Tournament
GT_SINGLE_PLAYER    // Single Player
GT_TEAM             // Team Deathmatch
GT_CTF              // Capture The Flag
GT_RTF              // Return The Flag
GT_1FCTF            // One Flag CTF
GT_CA               // Clan Arena
GT_FTAG             // Freeze Tag
GT_PTL              // Protect The Leader
Advanced syntax
The configuration system is pretty much an scripting language by itself, so their possibilities are a lot deeper. However, to understand all of this, a certain programming background is suggested, and since we won't turn this document into a programing tutorial, we include here some sample code to cover most of this advanced features:
// this all might look like php but always keep in mind, this is not php :)
//
// but you can edit this with your favourite editor supporting php syntax
// higlighting as it almost fits perfectly.

// access or assign cvars, its the same as "/set sample 0"
$sample = 0;

// to connect strings use the dot operator
$sample = "string1" . " string2";

// accessing or assigning attributes
railGun {
    cycle = 1100;
}

// is the same as
railGun->cycle = 1100;
// or
Rail Gun    ->   C y c l e = 1100;

// ternary operator.. this
$sample = ( $g_gametype == GT_FFA ? 1 : 2 );

// is the same as
if ( $g_gametype == GT_FFA ) {
    $sample = 1;
}
else {
    $sample = 2;
}

// calculations of any kind
$sample = railGun->cycle * 0.5;
$sample += railGun->cycle / railGun->damage;

$sample *= (float)VERSION;

// comparsion of any complexity
if ( $g_gametype == GT_TEAM || $mapname == "q3dm1" || ($timelimit > 10 && $fraglimit <= 30 && !$capturelimit) || $g_gametype >= GT_FTAG ) {
    // do something
}

// there are some "functions" you can call
// if you know any others that could be useful, tell me

/* debug( message ) */
debug("^1will print this message \n   with \"line breaks\" \n   to the console including the line number");

/* include( filename )
 *
 * parse the config file and returns 1 if parsing was successful, 0 in case of error
 * max recursion level is 8, so avoid any deeper cyclic includes since they will fail
 **/
if ( include( "default.cfg" ) ) {
    debug( "Default settings loaded again!" );
}

/* match( pattern, subject )
 *
 * wildcard matching.
 *   ? - matches one character
 *   * - matches none or any amount of characters
 *  \? - matches a ?
 *  \* - matches a *
 **/
if ( match("q3dm*", $mapname) ) {
}
// is the same as
if ( $mapname ~= "q3dm*" ) {
}

/* in( needle, value1 [, value2...] )
 *
 * check against multiple values
 **/
if ( in($g_gametype, GT_FFA, GT_FTAG, GT_CTF) ) {
}

/* exec( command ) */
if ( !match("*(sample cfg)", $sv_hostname) ) {
    // would be more simple without exec()
    //$sv_hostname .= " (sample cfg)";

    exec('set sv_hostname "'. $sv_hostname .' (sample cfg)"');
}

/* modifyitem( id, classname, newClassname [ , respawnTime = -1 [ , amount = -1 [ , x, y, z ] ] ] )
 *
 * id - 0 will replace all items that match
 * classname - case insensitive, can contain wildcards like "weapon_*"
 * newClassname - case insensitive, will replace the item, use empty string to ignore
 * respawnTime - time in seconds, default -1, argument is optional
 * amount - amount given on pickup, default -1, argument is optional
 * x, y, z - will adjust the items position, only makes sense if id > 0, arguments are optional
 *
 * the complete item classname list is the following:
 *
 * ARMOR
 *   item_armor_shard          item_armor_jacket        item_armor_combat
 *   item_armor_body
 * HEALTH
 *   item_health_small         item_health              item_health_large
 *   item_health_mega
 * WEAPONS
 *   weapon_gauntlet           weapon_shotgun           weapon_machinegun
 *   weapon_grenadelauncher    weapon_rocketlauncher    weapon_lightning
 *   weapon_railgun            weapon_plasmagun         weapon_bfg
 *   weapon_grapplinghook
 * AMMO
 *   ammo_shells               ammo_bullets             ammo_grenades
 *   ammo_cells                ammo_lightning           ammo_rockets
 *   ammo_slugs                ammo_bfg
 * HOLDABLE ITEMS
 *   holdable_teleporter       holdable_medkit
 * POWERUPS
 *   item_quad                 item_enviro              item_haste
 *   item_invis                item_regen               item_flight
 * FLAGS
 *   team_CTF_redflag          team_CTF_blueflag        team_CTF_neutralflag
 **/
// replace all weapons with mega health
modifyitem(0, "weapon_*", "item_health_mega");

// replace second rocket launcher with bfg and place it to the given coordinates (100, 125, 520)
modifyitem(2, "weapon_rocketlauncher", "weapon_bfg", -1, -1, 100, 125, 520);

// change mega health to give +200
modifyitem(0, "item_health_mega", "", -1, 200);

// matching is always based on the original item
// so the below would just switch the locations, not removing the grenades
modifyitem(0, "weapon_shotgun", "weapon_grenadelauncher");
modifyitem(0, "weapon_grenadelauncher", "weapon_shotgun");

/* abs( value )
 * min( value1, value2 [, value3...] )
 * max( value1, value2 [, value3...] )
 * clamp( min, max, value )
 **/
$sample = abs(-3);		// 3

$sample = min(5, 9, 1, 3);	// 1
$sample = max(5, 9, 1, 3);	// 9

$sample = clamp(5, 9, 1);	// 5
$sample = clamp(5, 9, 45);	// 9

// maybe a usefull introduction to the bitwise operators
if ( startWeapons & WP_MACHINEGUN ) {
    debug("we have the machinegun");
}

// set all the weapons except grapple
startWeapons = WP_ALL & ~WP_GRAPPLING_HOOK;

// add rocket launcher to our startweapons
// yes, we have it already but unlike the '+' operator, this will not break it
startWeapons |= WP_ROCKET_LAUNCHER;

// remove it
startWeapons &= ~WP_ROCKET_LAUNCHER;

/* "switch" syntax
 *
 * we have a complex switch syntax which differs from other languages.
 *
 * we allow to modify the comparison function for each case (like ==, <, >=, ~= etc)
 * also our switch has a different fall through behaviour, see the example below
 **/
$sample = "q3dm3";

switch ( $sample ) {
    case ~= "q3dm*":
        debug("^2we loaded settings for all q3dm* maps");

        // no break here, we will fall through

    case ~= "q3ctf*":
        // we did fall through but this will not match!

        debug("^2we loaded settings for all q3ctf* maps");

        // no break here, we will fall through

    // now lets have individual settings for some maps
    case "q3dm17":
        debug("^3we loaded special settings for q3dm17");
        break;

    case "q3dm1":
    case "q3dm3":
        debug("^3we loaded settings for q3dm1 or q3dm3");
        break;

    default:
        // this will only be reached if none of the above apply, for
        // example q3dm9 will not match because it already did in
        //    case ~= "q3dm*"
        //
        // but q3tourney2 will
        debug("^1we don't know the map");
}

// the above is the same as
if ( $sample ~= "q3dm*" ) {
    //debug("^2we loaded settings for all q3dm* maps");

    if ( $sample == "q3dm17" ) {
        //debug("^3we loaded special settings for q3dm17");
    }
    else if ( $sample == "q3dm1" || $sample == "q3dm3" ) {
        //debug("^3we loaded settings for q3dm1 or q3dm3");
    }
}
else if ( $sample ~= "q3ctf*" ) {
    //debug("^2we loaded settings for all q3ctf* maps");
}
else {
    //debug("^1we don't know the map");
}

// there are the for, while, do..while loops.. but maybe they will be
// removed as i cant think of any use
for ( $sample = 1; $sample <= 2; $sample++ ) {
    //debug("for-loop #". $sample);
}

while ( ++$sample <= 5 ) {
    //debug("while-loop #". $sample);
}

do {
    //debug("do-while-loop #". $sample);
    $sample++;
} while ( $sample < 8 );
Configuration of config voting
You can add the xp_config string to the xp_vote cvar anytime, and that will enable the players to /callvote the config they want. However, players will be able to vote any configuration they want, even non-existant ones.
To limit this, add the conf string instead, and put all the available configurations for voting inside the file specified by the xp_voteconf cvar (voteconf.txt by default). The syntax is pretty simple, as shown in the example:
// Add configurations you want to be voted.
// /callvote conf [filename]

// Format: filename  description

baseq3.cfg		Quake III Arena (baseq3)
default.cfg		Default Settings
excessive1.cfg		Mr. Pants Excessive Overkill v001
excessive2.cfg		Mr. Pants Excessive Overkill v002
excessive3.cfg		Mr. Pants Excessive Overkill v003
excessive4.cfg		Mr. Pants Excessive Overkill v004
excessive5.cfg		Excessive Overkill v005
Available options
Here is the default.cfg with self-explaining comments of all available options:
/* Default Settings
 *
 * THESE SETTINGS ARE EXECUTED PRIOR TO CUSTOM CONFIGURATIONS
 **/

Config {
    /* Name of the configuration
     *
     * Full name of the config. Will be added to the xp_config server cvar and
     * displayed on the client loading screen and scoreboard
     **/
    Name = "Default Settings";

    /* Some info for the config
     *
     * Just for documenting purposes since they are not accessible by any server cvar
     **/
    Date = "7 August 2009";
    Author = "easy <easy@excessiveplus.net>";
}

Misc {
    /* Physics
     *
     * Bitmask to modify physics behaviour. Available flags are:
     *
     * 1    PHYSICS_CONTROL_FORWARD     Enables forward physics control
     * 2    PHYSICS_CONTROL_SIDEWARD    Enables sideward physics control
     * 4    PHYSICS_CONTROL_STOP        Enables air stopping control
     * 8    PHYSICS_NO_RAMP_JUMPS       Disables ramp jumps
     *
     * A baseq3-alike physics config would have PHYSICS_NO_RAMP_JUMPS set as its value,
     * which is the same as 8, whereas a cpma-alike config would have PHYSICS_CONTROL_FORWARD |
     * PHYSICS_CONTROL_SIDEWARD | PHYSICS_CONTROL_STOP, which is the same as 7 (1+2+4).
     **/
    //$xp_physics = PHYSICS_NO_RAMP_JUMPS;

    /* Unlagged
     *
     * Bitmask to turn on/off unlagged specifically for each weapon. Available
     * flags include (they are self explanatory):
     *
     * 4     WP_MACHINEGUN
     * 8     WP_SHOTGUN
     * 16    WP_GRENADE_LAUNCHER
     * 32    WP_ROCKET_LAUNCHER
     * 64    WP_LIGHTNING
     * 128   WP_RAILGUN
     * 256   WP_PLASMAGUN
     * 512   WP_BFG
     * 1024  WP_GRAPPLING_HOOK
     *
     * 0     WP_NONE
     * 2046  WP_ALL
     *
     * If you don't want to mess with these values, a value of 1 is the shorthand for WP_ALL,
     * which delags all weapons, including all projectiles. If you prefer old unlagged for
     * which only the hitscan weapons are delagged, use instead WP_MACHINEGUN | WP_SHOTGUN |
     * WP_LIGHTNING | WP_RAILGUN, which is the same as 204 (4+8+64+128).
     **/
    //$xp_unlagged = 1;

    /* Solids
     *
     * Bitmask to control how the player interacts with other solid entities on the world.
     * Available flags are:
     *
     * 1    SOLIDS_PLAYER       Removes map clips, so you have access to more places on the map
     * 2    SOLIDS_BODY         Removes collisions with other players and bodies (including
     *                          frozen ones), useful for a faster-paced game and to remove
     *                          lagged collisions for high pingers
     * 4    SOLIDS_WEAPON       Removes weapon hit tests, so weapons will not hit an enemy,
     *                          useful on trick maps
     **/
    //$xp_solids = no;

    /* Warmup Respawn
     *
     * Controls what is respawned at the end of warmup time. Available flags are:
     *
     * 1    WARMUPRESPAWN_PLAYERS
     * 2    WARMUPRESPAWN_ITEMS
     *
     * To reproduce 1.03, you would like to disable this option.
     **/
    //$xp_warmupRespawn = WARMUPRESPAWN_PLAYERS | WARMUPRESPAWN_ITEMS;

    /* You will start with this weapon in your hands
     *
     * If the weapon is not in your inventory when you respawn, then the highest available
     * weapon below your currently selected one will be used instead.
     *
     * WP_GAUNTLET
     * WP_MACHINEGUN
     * WP_SHOTGUN
     * WP_GRENADE_LAUNCHER
     * WP_ROCKET_LAUNCHER
     * WP_LIGHTNING
     * WP_RAILGUN
     * WP_PLASMAGUN
     * WP_BFG
     * WP_GRAPPLING_HOOK
     *
     * WP_LAST_USED
     **/
    Start Weapon = WP_BFG;

    /* Weapons in your inventory
    *
    * WP_GAUNTLET
    * WP_MACHINEGUN
    * WP_SHOTGUN
    * WP_GRENADE_LAUNCHER
    * WP_ROCKET_LAUNCHER
    * WP_LIGHTNING
    * WP_RAILGUN
    * WP_PLASMAGUN
    * WP_BFG
    * WP_GRAPPLING_HOOK
    *
    * WP_NONE
    * WP_ALL
    **/
    Start Weapons = WP_GAUNTLET | WP_MACHINEGUN;

    /* Your powerups on every spawn
     *
     * PW_QUAD
     * PW_BATTLESUIT
     * PW_HASTE
     * PW_INVIS
     * PW_REGEN
     * PW_FLIGHT
     *
     * PW_NONE
     * PW_ALL
     **/
    Start Powerups = no;

    // Duration of start powerups
    Start Powerups Duration = 30;

    /* Map Weapons
     *
     * WP_MACHINEGUN
     * WP_SHOTGUN
     * WP_GRENADE_LAUNCHER
     * WP_ROCKET_LAUNCHER
     * WP_LIGHTNING
     * WP_RAILGUN
     * WP_PLASMAGUN
     * WP_BFG
     *
     * WP_NONE
     * WP_ALL
     **/
    Weapons = WP_ALL;

    /* Map Items
     *
     * IT_ARMOR_SHARD
     * IT_ARMOR_JACKET
     * IT_ARMOR_COMBAT
     * IT_ARMOR_BODY
     * IT_HEALTH_SMALL
     * IT_HEALTH
     * IT_HEALTH_LARGE
     * IT_HEALTH_MEGA
     * IT_TELEPORTER
     * IT_MEDKIT
     *
     * IT_NONE
     * IT_ALL
     **/
    Items = IT_ALL;

    /* Map Ammos
     *
     * AM_BULLETS
     * AM_SHELLS
     * AM_GRENADES
     * AM_ROCKETS
     * AM_LIGHTNING
     * AM_SLUGS
     * AM_CELLS
     * AM_BFG
     *
     * AM_NONE
     * AM_ALL
     **/
    Ammos = AM_ALL;

    /* Map powerups
     *
     * PW_QUAD
     * PW_BATTLESUIT
     * PW_HASTE
     * PW_INVIS
     * PW_REGEN
     * PW_FLIGHT
     *
     * PW_NONE
     * PW_ALL
     **/
    Powerups = PW_ALL;

    /* Enables the /drop command
     *
     * DR_FLAG          Enables /drop flag
     * DR_WEAPON        Enables /drop weapon [<weaponNum>]
     * DR_AMMO          Enables /drop ammo [<weaponNum>] [<amount>]
     * DR_POWERUP       Enables /drop powerup [<name>]
     * DR_HOLDABLE      Enables /drop holdable
     * DR_ARMOR         Enables /drop armor <amount>
     * DR_HEALTH        Enables /drop health <amount>
     *
     * DR_NONE
     * DR_ALL
     **/
    Drop Enable = DR_NONE;

    /* Spawn protection in seconds
     *
     *   0 - No protection
     * > 0 - Dual way protection. No points or freezes for spawnkills
     * < 0 - Shield protection
     **/
    Spawn Protection = no;

    /* Weapon change time in milliseconds
     *
     * Settings for modifying the behavior of weapon switch time
     *
     * Converstion from 1.03
     *
     *      SwitchTime = 150;        Dropping = -150;
     *                               Raising = -1 - 100;
     *                               Ammo = -150 - 100;
     *
     *      SwitchTime = -150;       Dropping = 150;
     *                               Raising = 150;
     *                               Ammo = 150 + 100;
     **/
    Weapon Time {
        /* How long does it take to stow away the current weapon
         *
         * > 0 - Adds (value - 1) to the current time
         * < 0 - Sets (+value - 1) as the current time. This allows switching even just
         *       after firing the weapon
         *   0 - Same as 201
         **/
        Dropping = 0;

        /* How long does it take to pull out the next weapon
         *
         * > 0 - Adds (value - 1) to the current time. In combination with negative
         *       dropping weapon times, you can use this when you want to allow
         *       a weapon switch to bypass the weapon reload time
         * < 0 - Adds the maximum of (+value - 1) and global weapon time to the current
         *       time, so the switch will not bypass the weapon reload time
         *   0 - Same as 251
         **/
        Raising = 0;

        /* Out of Ammo slowdown
         *
         * 0 - Same as 501
         **/
        Ammo = 0;

        /* How long does it take to start switching right after firing the weapon
         *
         * Used only in combination with positive dropping weapon times, ignored otherwise
         *
         * 0 - Use weapon cycle time
         **/
        Shooting = 0;
    }

    // Multiple Air-Jumps
    Multi Jumps = no;

    /* DM Flags
     *
     * Miscellaneous flags to modify several aspects of the game. Available flags are:
     *
     * DM_NO_SELF_DAMAGE        Weapons don't do self damage
     * DM_NO_FALLING_DAMAGE     No falling damage
     * DM_INFINITE_HEALTH       Infinite health (can only be killed by falling or crushed)
     * DM_INFINITE_ARMOR        Infinite armor
     * DM_INFINITE_AMMO         Infinite ammo
     * DM_DROP_WEAPONS          Drop used weapon on death if it was picked up
     * DM_DROP_START_WEAPONS    Drop used weapon on death if it was an starting weapon
     * DM_DROP_HOLDABLES        Drop holdables on death
     * DM_DROP_POWERUPS         Drop powerups on death
     * DM_TELEPORT_SPEED        Keep speed when jumping into a teleport
     * DM_TELEPORT_DIRECTION    Keep the direction when jumping into a teleport
     * DM_NO_FOOTSTEPS          Disable footsteps sounds
     * DM_NO_FALLING_SOUND      Disable falling (land crashing) sounds
     * DM_NO_QUAD_KNOCKBACK     Disable quad factor effect in self knocback
     **/
    DM Flags = DM_DROP_WEAPONS | DM_DROP_HOLDABLES | DM_DROP_POWERUPS;

    /* Team self damage factor
     *
     * When $g_friendlyFire is on, damage inflicted to teammates will hurt ourselves by the
     * value of this option
     **/
    Team Self Damage = 0.0;

    // Respawn in seconds
    Respawn Time = 1.7;

    // If specified, replaces Respawn Time after suicide
    //Respawn Time Suicide = Respawn Time;

    /* Player hitbox
     *
     *   1.0 - default
     * < 1.0 - smaller box
     * > 1.0 - larger box
     **/
    Hit Box = 1.0;

    /* Floating Speed is a stepwise (smooth) speed adjustment used when
     * various speed factors take effect (like weapon weight or haste factor).
     * Floating Speed Rate is measured in UPS per second and it defines how fast
     * the speed will go to the final value. Null or negative rates are treated
     * as infinite (leading to one-step speed changes).
     **/
    Floating Speed Rate = 0;

    // Damage taken from world
    World Damage {
        Fall Medium = 5;
        Fall Far = 10;
        Lava = 30;
        Slime = 10;
        Water = 15;
    }

    /* Speed factor with Haste powerup
     *
     * Will be applied to player speed, weapon fire rate and weapon regeneration
     **/
    Haste Factor = 1.3;

    // Regen powerup amounts every second
    Regen Factors {
        // How much to increase health when it is under soft limit value
        Soft Health = 15;

        // How much to increase health when it is over soft limit value
        Hard Health = Soft Health / 3;

        // How much to increase armor when it is under soft limit value
        Soft Armor = 0;

        // How much to increase armor when it is over soft limit value
        Hard Armor = 0;
    }

    // Protection against damage with Battlesuit powerup
    Suit Factors {
        // Factor applied to damage inflicted directly
        Direct = 0.5;

        // Factor applied to damage provoked by splash hits
        Splash = 0;
    }

    // Speed fly factor with Flight powerup
    Flight Factor = 1.0;

    // Speed factor while swimming
    Swim Factor = 1.0;

    // Spawn with this amount of health, also medkit will heal the player until this value
    Health = 125;

    // Rot rate in milliseconds when health is over soft limit value
    Health Rot Rate = 1000;

    // Limit for regeneration/soft pickups
    Health Soft Limit = 100;

    // Maximum possible health
    Health Hard Limit = 200;

    // Regeneration in milliseconds
    Health Regen = no;
    Health Regen Amount = 1;

    // Spawn with this amount of armor
    Armor = 0;

    // Rot rate in milliseconds when armor is over soft limit value
    Armor Rot Rate = 1000;

    // Limit for regeneration/soft pickups
    Armor Soft Limit = 0;

    // Maximum possible armor
    Armor Hard Limit = 0;

    // Regeneration in milliseconds
    Armor Regen = 0;
    Armor Regen Amount = 1;

    Armor System {
        /* Armor System
         *
         *  0 - Regular VQ3 System
         *  1 - Quake I / CPMA System
         *  2 - Quake II System
         **/
        System = 0;

        /* Spawn with this Armor
         *
         * IT_ARMOR_JACKET (green)
         * IT_ARMOR_COMBAT (yellow)
         * IT_ARMOR_BODY   (red)
         **/
        Spawn Quality = IT_ARMOR_JACKET;

        // Limits for item pickups
        Jacket Limit = 100;
        Combat Limit = 150;
        Body Limit = 200;

        // Protection against damage
        Jacket Quality = 0.5;
        Combat Quality = 0.66;  // This applies for all systems, as you always have the combat armor
        Body Quality = 0.75;
    }

    Corpse {
        // Gib death bodys ($com_blood must be enabled)
        Gib = no;

        // Time in seconds until corpse dissapears
        Time = 5;
    }

    Missiles {
        // Made missiles destroyable by other weapons
        Destroyable = 0;

        // Teleport missiles through teleporters
        Teleport = 0;
    }

    Anti Camp {
        // Time in seconds, 0 disables camp protection
        Time = 0;

        // Apply camp protection to a max of this radius
        Radius = 500;

        // Damage to inflict every second after time is run out if the user keeps camping
        Damage = 65;
    }

    // Specific options for team red
    Team Red {
        Start Weapon = 0;
        Start Weapons = 0;
        Start Powerups = 0;
        Start Powerups Duration = 0;
    }

    // Specific options for team blue
    Team Blue {
        Start Weapon = 0;
        Start Weapons = 0;
        Start Powerups = 0;
        Start Powerups Duration = 0;
    }

    // Points applied if a team scores
    Team Score {
        Team = 1;
        Members = 0;

        Other Team = 0;
        Other Members = 0;
    }

    /* Tournament
     *
     * The opponent will score if you die, regardless of the way it happens
     **/
    Tournament -> Death Score = no;

    /* Capture the Flag
     *
     * Settings applied for flag gametypes
     **/
    Capture the Flag {
        // Auto return time in seconds
        Flag Time = 30;

        // Return flag on suicide
        Suicide Return = true;

        // Scores
        Kill Carrier = 2;
        Defend Hurt Carrier = 2;
        Defend Carrier = 2;
        Defend Base = 1;
        Defend Flag = 1;
        Flag Return = 1;
        Flag Capture = 5;
        Flag Assist Return = 1;
        Flag Assist Frag = 2;

        if ( $g_gametype == GT_RTF ) {
            Flag Return *= 2;
        }
    }

    /* Freeze Tag
     *
     * Thaw times in seconds.
     *
     *   0 - No thawing
     * > 0 - Continue the thaw
     * < 0 - Forces a restart
     **/
    Freeze Tag {
        Thaw Time = -3;

        Self Thaw Time = Water Thaw Time = 120;
        Lava Thaw Time = Slime Thaw Time = 5;
        Void Thaw Time = 10;
        Crushed Thaw Time = 0.001;

        // Distance needed to defrost your team mate
        Thaw Distance = 100;

        // Points for defrosting
        Thaw Score = 2;

        // Thaw if the frozen body touches a teleport?
        Teleport Thaw = no;

        /* Defrost if you reach the damage.
         * You won't get any points for that.
         *
         *   0 - Disabled
         * > 0 - You can defrost your enemys, be careful were you are shooting at
         * < 0 - Only own team
         **/
        Damage Thaw = 1000;

        // Freeze player if teamkilled? If disabled, player will be crushed
        Teamkill Freeze = no;
    }

    /* Protect the Leader
     *
     * The current leader will have these settings applied
     **/
    Protect the Leader {
        Start Health = 125;
        Start Armor = 100;
        Start Armor Quality = IT_ARMOR_JACKET;
        Start Weapon = WP_GAUNTLET;
        Start Weapons = WP_GAUNTLET;
        Start Powerups = PW_REGEN;

        // Scores
        Kill Leader = 4;
        Defend Leader = 1;
        Assist Kill Leader = 1;

        // Score on leader suicide/teamkill?
        Leader Suicide Score = yes;

        /* Control which player stats are cleared when he stops being the leader
         *
         * RESET_HEALTH
         * RESET_ARMOR
         *
         * RESET_NONE
         * RESET_ALL
         **/
        Reset Flags = RESET_HEALTH | RESET_ARMOR;
    }

    /* Round end actions
     *
     * Settings applied to all round based gametypes
     **/
    Round {
        /* Items that are reset
         *
         * IT_ARMOR_SHARD
         * IT_ARMOR_JACKET
         * IT_ARMOR_COMBAT
         * IT_ARMOR_BODY
         * IT_HEALTH_SMALL
         * IT_HEALTH
         * IT_HEALTH_LARGE
         * IT_HEALTH_MEGA
         * IT_TELEPORTER
         * IT_MEDKIT
         *
         * IT_NONE
         * IT_ALL
         **/
        Items = IT_NONE;

        /* Controls which player stats are cleared
         *
         * RESET_HEALTH
         * RESET_ARMOR
         * RESET_WEAPONS
         * RESET_POWERUPS
         *
         * RESET_NONE
         * RESET_ALL
         **/
        Reset Flags = RESET_ARMOR | RESET_WEAPONS | RESET_POWERUPS;

        // Round warmup time, only when $xp_matchmode is 2
        Warmup = 4;

        // Shuld players respawn after round warmup? Only when $xp_matchmode is 2
        Warmup Respawn = $xp_warmupRespawn & WARMUPRESPAWN_PLAYERS;

        // Call for draw when all players are dead instead of deciding with the latest frag
        Draw Enable = no;
    }

    Items {
        // Make items shootable
        Shootable = no;

        // Speed at which items will be dropped
        Drop Speed = 500;

        // Bounce damping factor [1...0...-1] that is equivalent to
        // [infinite bouncing...no bounce at all...infinite reflecting]
        Drop Bouncy = 0.45;

        // if Drop Gravity = no, then item will initially fly with no gravity
        // (straight forward) until the first bounce, and fall then
        Drop Gravity = yes;

        // These Attackerward drop settings control the flag dropping on death.
        // When the Attackerward Drop Speed is not null, then on death the flag will
        // be dropped right to the attacker with these speed, bouncy and gravity.
        // Certain settings are specified in the same way as for the item dropping
        Attackerward -> Drop Speed = 0;
        Attackerward -> Drop Bouncy = 0.45;
        Attackerward -> Drop Gravity = yes;
    }
}
/* Weapon Settings
 *
 * Common settings:
 *
 * - Cycle                 Weapon reload time
 *
 * - Damage                Amount of damage inflicted
 *
 * - Knockback             Damage and Knockback have been separated. You can have high damage
 *                         weapons but disable or lower the pushing effect. A negative value
 *                         will pull the player instead of pushing him. If not specified,
 *                         value is taken from Damage setting
 *
 * - Radius                Radius to apply to splash damage and for within splash and self
 *                         knockback have effect
 *
 * - Splash Damage         Max amount of splash damage to inflict, real damage will vary
 *                         depending on the distance of the enemy to the explosion
 *
 * - Splash Knockback      Max amount of splash knockback to apply to other players. If not
 *                         specified, value is taken from Splash Damage setting
 *
 * - Self Knockback        Amount of splash knockback to apply only to self. A positive value
 *                         means radial knockback, whereas a negative value means a fixed value
 *                         regardless of the distance of the explosion. If not specified,
 *                         value is taken from Splash Knockback setting
 *
 * - Self Knockback HV     Horizontal/Vertical asymmetry control for the Self Knockback
 *                         It may vary in range [1...0...-1] and that is equivalent to
 *                         [just horizontal...symmetric...just vertical] knockback proportion
 *
 * - Self Slide Factor     Multiplier to the time to slide with no control, no friction
 *                         and no gravity after being kicked by self
 *
 * - Firing Knockback      Amount of knockback to apply to self when firing the gun, wich
 *                         produces a kick effect
 *
 * - Firing Knockback HV   Horizontal/Vertical asymmetry control for the Firing Knockback.
 *                         Range and meanings see the Self Knockback HV description.
 *                         While standing on ground the vertical portion of firing knockback
 *                         will be not greater than (limited to) its horizontal portion
 *
 * - Team Knockback        Same as Knockback but applied to your teammates when you attack them.
 *                         If specified, it will replace the Knockback for the team attack
 *
 * - Team Splash Knockback Same as Splash Knockback but applied to your teammates when you
 *                         attack them. If specified, it will replace the Splash Knockback
 *                         for the team attack
 *
 * - Ammo                  Amount of ammo to spawn for with that weapon
 *
 * - Ammo Limit            Limit ammo pickups up to this value
 *
 * - Regen                 Number of milliseconds for which to regenerate 1 ammo unit up to
 *                         the value of the Ammo. Weapon must not be firing to take effect
 *
 * - Sky                   If enabled, the weapon and missiles will hit the sky/black box
 *
 * - Weight                Weitgh of the weapon. Player Speed = Player Speed / Weapon Weight
 *
 * - Bounce                Number of times to bounce the shots/missiles before they explode.
 *                         A value of -1 will bounce max times alowed by the mod
 *
 * - Speed                 Only for missiles. Speed at which missiles move
 *
 * - Gravity               Only for missiles. If enabled, the missile will be affected by
 *                         gravity
 *
 * - Time To Live          Only for missiles. Number of seconds for the missile to run before
 *                         it explodes
 *
 * - Time -> *             Weapon switch time specific settings. A value of 0 for any of these
 *                         setting will use global value instead
 *
 * - Style                 Weapon style bitmask. Available flags (some weapons do have addition
 *                         styles available, see the specific weapon section):
 *                             WPS_RAILTRAIL           Produce a rail trail (available only for
 *                                                     machinegun, shotgun and railgun)
 *                             WPS_IMPACT_MACHINEGUN   Produce a machinegun bullet impact
 *                             WPS_IMPACT_SHOTGUN      Produce a shotgun bullet impact
 *                             WPS_IMPACT_GRENADE      Produce a grenade explosion
 *                             WPS_IMPACT_ROCKET       Produce a rocket explosion
 *                             WPS_IMPACT_PLASMA       Produce a plasma explosion
 *                             WPS_IMPACT_RAIL         Produce a rail impact
 *                             WPS_IMPACT_BFG          Produce a bfg explosion
 **/

// Explosion produced when a player is killed, regardless of the way he dies
Suicide {
    Damage = no;
    //Knockback = Damage;
    Radius = no;
    Style = no;
    //Team Knockback = Knockback;
}

Grapple {
    Offhand = no;
    Cycle = 400;
    Damage = 300;
    //Knockback = Damage;
    Splash Damage = 0;
    //Splash Knockback = Splash Damage;
    Radius = no;
    Self Damage = 0.5;
    //Self Knockback = Splash Knockback;
    Self Knockback HV = 0.0;
    Self Slide Factor = 1.0;
    Firing Knockback = 0;
    Firing Knockback HV = 0.8;
    //Team Knockback = Knockback;
    //Team Splash Knockback = Splash Knockback;
    Speed = 2000;

    // Release the hook in seconds
    Time = 10;

    Pull Speed = 800;

    /* Grapple Style
     *
     * WPS_GRAPPLE_ROPE     You will swing around like hanging on a rope
     **/
    Style = 0;

    // The hook is auto-released if you receive at least this amount of knockback
    // (negative==infinite). However the hook is always released with any self knockback
    Breaking Knockback = 0;

    Gravity = no;
    Sky = no;
    Time to Live = 10;
    Weight = 1.0;
    Firing Weight = 1.0;
    Time -> Dropping = 0;
    Time -> Raising = 0;
    Time -> Shooting = 0;
}

Gauntlet {
    Cycle = 400;
    Damage = 50;
    //Knockback = Damage;
    //Team Knockback = Knockback;
    Weight = 1.0;

    // How long-distance is the gauntlet attack (in game units, while a player is normally 30x30x56)
    Distance = 32;

    /* Gauntlet Style
     *
     * WPS_GAUNTLET_DYNAMIC_WEIGHT  Gauntlet Firing Weight will be applied only while
     *                              you are contacting with ground or swimming
     **/
    Style = 0;

    Firing Weight = 1.0;
    Time -> Dropping = 0;
    Time -> Raising = 0;
    Time -> Shooting = 0;
}

Machinegun {
    Cycle = 100;
    Damage = ( $g_gametype != GT_TEAM ? 7 : 5 );
    //Knockback = Damage;
    Splash Damage = 0;
    //Splash Knockback = Splash Damage;
    Radius = no;
    Self Damage = 0.5;
    //Self Knockback = Splash Knockback;
    Self Knockback HV = 0.0;
    Self Slide Factor = 1.0;
    Firing Knockback = 0;
    Firing Knockback HV = 0.8;
    //Team Knockback = Knockback;
    //Team Splash Knockback = Splash Knockback;
    Regen = no;
    Ammo = 100;
    Ammo Limit = 200;
    Style = WPS_IMPACT_MACHINEGUN;
    Bounce = no;

    // Machinegun spread factor
    Spread = 200;

    // Use radial spread? If disabled, it will use quadratic spread (old mods before 1.29)
    Radial = yes;

    Sky = no;
    Weight = 1.0;
    Firing Weight = 1.0;
    Time -> Dropping = 0;
    Time -> Raising = 0;
    Time -> Ammo = 0;
    Time -> Shooting = 0;
}

Shotgun {
    Cycle = 1000;
    Damage = 10;
    //Knockback = Damage;
    Splash Damage = 0;
    //Splash Knockback = Splash Damage;
    Radius = no;
    Self Damage = 0.5;
    //Self Knockback = Splash Knockback;
    Self Knockback HV = 0.0;
    Self Slide Factor = 1.0;
    Firing Knockback = 0;
    Firing Knockback HV = 0.8;
    //Team Knockback = Knockback;
    //Team Splash Knockback = Splash Knockback;

    // Number of pellets that come out from a single shot
    Pellet Count = 11;

    // Shotgun spread factor
    Spread = 700;

    // Use radial spread? If disabled, it will use quadratic spread (default)
    Radial = no;

    Regen = no;
    Ammo = 0;
    Ammo Limit = 200;
    Style = WPS_IMPACT_SHOTGUN;
    Bounce = no;
    Sky = no;
    Weight = 1.0;
    Firing Weight = 1.0;
    Time -> Dropping = 0;
    Time -> Raising = 0;
    Time -> Ammo = 0;
    Time -> Shooting = 0;
}

Grenade Launcher {
    Cycle = 800;
    Damage = 100;
    //Knockback = Damage;
    Splash Damage = 100;
    //Splash Knockback = Splash Damage;
    Radius = 150;
    Self Damage = 0.5;
    //Self Knockback = Splash Knockback;
    Self Knockback HV = 0.0;
    Self Slide Factor = 1.0;
    Firing Knockback = 0;
    Firing Knockback HV = 0.8;
    //Team Knockback = Knockback;
    //Team Splash Knockback = Splash Knockback;
    Regen = 0;
    Speed = 700;
    Ammo = 0;
    Ammo Limit = 200;

    /* Grenade Launcher Style
     *
     * WPS_GRENADE_STICKY   Grenades will stick to walls, like mines
     **/
    Style = WPS_IMPACT_GRENADE;

    Bounce = -1;
    Gravity = yes;
    Time to Live = 2.5;
    Sky = no;
    Weight = 1.0;
    Firing Weight = 1.0;
    Time -> Dropping = 0;
    Time -> Raising = 0;
    Time -> Ammo = 0;
    Time -> Shooting = 0;
}

Rocket Launcher {
    Cycle = 800;
    Damage = 100;
    //Knockback = Damage;
    Splash Damage = 100;
    //Splash Knockback = Splash Damage;
    Radius = 120;
    Self Damage = 0.5;
    //Self Knockback = Splash Knockback;
    Self Knockback HV = 0.0;
    Self Slide Factor = 1.0;
    Firing Knockback = 0;
    Firing Knockback HV = 0.8;
    //Team Knockback = Knockback;
    //Team Splash Knockback = Splash Knockback;
    Regen = no;
    Speed = 900;
    Ammo = 0;
    Ammo Limit = 200;

    /* Rocket Launcher Styles
     *
     * WPS_ROCKET_GUIDED    Allows to control the rocket with your mouse
     * WPS_ROCKET_HOMING    Rocket will hunt your enemys
     **/
    Style = WPS_IMPACT_ROCKET;

    // Rocket launcher homing factor (only for WPS_ROCKET_HOMING style)
    Homing Factor = 0.3;

    Bounce = no;
    Gravity = no;
    Time to Live = 15;
    Sky = no;
    Weight = 1.0;
    Firing Weight = 1.0;
    Time -> Dropping = 0;
    Time -> Raising = 0;
    Time -> Ammo = 0;
    Time -> Shooting = 0;
}

Lightning Gun {
    Cycle = 50;
    Damage = 8;
    //Knockback = Damage;
    Splash Damage = 0;
    //Splash Knockback = Splash Damage;
    Radius = no;
    Self Damage = 0.5;
    //Self Knockback = Splash Knockback;
    Self Knockback HV = 0.0;
    Self Slide Factor = 1.0;
    Firing Knockback = 0;
    Firing Knockback HV = 0.8;
    //Team Knockback = Knockback;
    //Team Splash Knockback = Splash Knockback;
    Regen = no;
    Ammo = 0;
    Ammo Limit = 200;
    Style = no;
    Sky = no;

    // Lightning gun beam length
    Range = 768;

    // Lightning gun bounce. THIS WILL CRASH ALL CLIENTS WITHOUT MOD!
    Bounce = no;

    Weight = 1.0;
    Firing Weight = 1.0;
    Time -> Dropping = 0;
    Time -> Raising = 0;
    Time -> Ammo = 0;
    Time -> Shooting = 0;
}

Railgun {
    Cycle = 1500;
    Damage = 100;
    //Knockback = Damage;
    Splash Damage = 0;
    //Splash Knockback = Splash Damage;
    Radius = no;
    Self Damage = 0.5;
    //Self Knockback = Splash Knockback;
    Self Knockback HV = 0.0;
    Self Slide Factor = 1.0;
    Firing Knockback = 0;
    Firing Knockback HV = 0.8;
    //Team Knockback = Knockback;
    //Team Splash Knockback = Splash Knockback;
    Regen = no;
    Ammo = 0;
    Ammo Limit = 200;
    Style = WPS_RAILTRAIL | WPS_IMPACT_RAIL;
    Bounce = no;
    Sky = no;
    Weight = 1.0;
    Firing Weight = 1.0;
    Max Hits = 4;
    Time -> Dropping = 0;
    Time -> Raising = 0;
    Time -> Ammo = 0;
    Time -> Shooting = 0;
}

Plasma Gun {
    Cycle = 100;
    Damage = 20;
    //Knockback = Damage;
    Splash Damage = 15;
    //Splash Knockback = Splash Damage;
    Radius = 20;
    Self Damage = 0.5;
    //Self Knockback = Splash Knockback;
    Self Knockback HV = 0.0;
    Self Slide Factor = 1.0;
    Firing Knockback = 0;
    Firing Knockback HV = 0.8;
    //Team Knockback = Knockback;
    //Team Splash Knockback = Splash Knockback;
    Regen = no;
    Speed = 2000;
    Ammo = 0;
    Ammo Limit = 200;

    /* Plasma Gun Styles
     *
     * WPS_PLASMA_SPLIT     Adds 3 plasma streams
     **/
    Style = WPS_IMPACT_PLASMA;

    // Plasmagun spread (only for WPS_PLASMA_SPLIT style)
    Spread = 300;

    Bounce = no;
    Gravity = no;
    Time to Live = 10;
    Sky = no;
    Weight = 1.0;
    Firing Weight = 1.0;
    Time -> Dropping = 0;
    Time -> Raising = 0;
    Time -> Ammo = 0;
    Time -> Shooting = 0;
}

BFG {
    Cycle = 200;
    Damage = 100;
    //Knockback = Damage;
    Splash Damage = 100;
    //Splash Knockback = Splash Damage;
    Radius = 120;
    Self Damage = 0.5;
    //Self Knockback = Splash Knockback;
    Self Knockback HV = 0.0;
    Self Slide Factor = 1.0;
    Firing Knockback = 0;
    Firing Knockback HV = 0.8;
    //Team Knockback = Knockback;
    //Team Splash Knockback = Splash Knockback;
    Regen = no;
    Speed = 2000;
    Ammo = 0;
    Ammo Limit = 200;

    /* BFG Styles
     *
     * WPS_BFG_PANTS    Mr. Pants' Excessive
     * WPS_BFG_SOD      SoD MoD
     **/
    Style = WPS_IMPACT_BFG;

    /* Grenade Settings
     *
     * Only valid if WPS_BFG_PANTS or WPS_BFG_SOD is set
     **/
    Grenade Count = 7;        // valid for WPS_BFG_PANTS only, WPS_BFG_SOD will always use 4
    Grenade Damage = 80;
    //Grenade Knockback = Grenade Damage;
    Grenade Splash Damage = 200;
    //Grenade Splash Knockback = Grenade Splash Damage;
    Grenade Radius = 80;
    //Grenade Self Knockback = Grenade Splash Knockback;
    Grenade Style = WPS_IMPACT_GRENADE;
    //Grenade Team Knockback = Grenade Knockback;
    //Grenade Team Splash Knockback = Grenade Splash Knockback;

    Bounce = no;
    Gravity = no;
    Time to Live = 10;
    Sky = no;
    Weight = 1.0;
    Firing Weight = 1.0;
    Time -> Dropping = 0;
    Time -> Raising = 0;
    Time -> Ammo = 0;
    Time -> Shooting = 0;
}
Inner loading of other configs
You can load another config inside your own config file with the following syntax :
/* include( filename )
*
* parse the config file and returns 1 if parsing was successful, 0 in case of error
* does not limit the recursion level, so avoid any cyclic includes
**/
if ( include( "default.cfg" ) ) {
    debug( "default settings successfully loaded !" );
} else {
    debug( "ERROR : default settings could not be loaded !" );
}
An altenative is by issuing a :
exec("load default"); But with exec(), the config will be loaded after your config will be processed by the engine. With include(), it will be processed wherever you place it in your code.
Crontab
Set the xp_crontab "crontab.txt" variable to the file where your crontab script is.
A crontab is basically a list of commands that are executed at a given date/time.
The syntax format is the same as the *nix crontab use.
Short overview
Each line has the format: minute hour day month dayofweek /command
For any of the above values, an asterisk (*) can be used to specify all valid values. For example, an asterisk for the month value will execute the command every month within the constraints of the other values.
A hyphen (-) between numbers specifies a range. For example, 1-4 will expand to 1, 2, 3 and 4.
A list of values separated by commas (,) specifies a list. For example, 3,4,6,8 indicate those four specific numbers (note that there are no spaces between the commas).
The forward slash (/) can be used to specify step values. The value of an number can be skipped within a range by following the range with /. For example, 0-59/2 can be used to define every other minute in the minute field. Step values can also be used with an asterisk. For instance, the value */3 can be used in the month field to run the task every third month.
Any lines that begin with a hash mark (#) or a double slash (//) are comments and are not processed. Additionally, an slash followed by an asterisk (/*) indicates the start of a comment, which can be spread across multiple lines until an asterisk followed by an slash (*/) is found.
Example:
# examples
* * * * *	/say this is executed every minute!
* * * * 1	/say this is executed every minute but only on mondays!
*/5 * * * *	/say this is executed every 5 minutes!
0 15 5 2 *	/say this is executed on the 5th February at 15:00 o'clock!

# display motd popup message every 5 minutes
*/5 * * * *	/motd all welcome_message.txt

# display greeting with hostname every half an hour
10,40 * * * *	/say ^2Welcome on ^7$(sv_hostname)^7

# display g_motd command info into crontab every 5 minutes
*/5 * * * *	/say $(g_motd)

# display number of active players every 3 minutes
*/3 * * * *	/say ^7There is currently ^2$(xp_activeClients) ^7players on the server!

# randomize rotation
* * * * *	/execstr set xp_rotateStep $sv_serverid

# change config at midnight
0 0 * * *	/exec your-midnight-fun.cfg
Conditional processing
Basic if-else structures are supported in crontab files. This allows you to execute commands only if a certain condition is met. The syntax of if-else structures is the same as the one used in the Rotation System, so refer to it for further information.
Example:
// remind the users to remove the password at the end of a war
if ( g_needpass ) {
    */10 * * * *    /say ^3Remember to remove the password at the end of the war!
}

// say something depending on the number of clients
if ( xp_activeClients >= 14 ) {
    */5 * * * *     /say ^3Wow, server is really crowded! :D
} else if ( xp_activeClients >= 8 ) {
    */5 * * * *     /say ^3Expecting more players to come :P
} else if ( xp_activeClients > 0 ) {
    */5 * * * *     /say ^3Please don't leave the server! :(
} else {
    */5 * * * *     /say ^3To any spectator, join the game and stop wasting server slots!! :@
}
Game Types
In Excessive Plus you have 4 great and all new gametypes to play with! Of course the old are still unchanged and there like Free for All (g_gametype 0), Tournament (g_gametype 1), Team Deathmatch (g_gametype 3) and Capture the Flag (g_gametype 4).
Additionally, there exist lots of configuration options to modify the behavior and scoring rules of these gametypes, refer to the Configuration System documentation for more information.
Tournament
1on1 (g_gametype 1). Well, yes you all know what it is but Excessive Plus added a new feature to have map rotations for this gametype. The rotation works the same as for any other gametype.
Capture the Flag
CTF (g_gametype 4). As with tournament, we all know what this gametype is about. However, with the xp_crazyCTF cvar you can completely modify the behavior of this gametype (actually for all flag-based gametypes), turning it into a fast-paced capturing fest.
Return the Flag
RTF (g_gametype 5). This one is more difficult than the regular Capture the Flag but also the better team game. Though the only difference is that you have to carry your own flag back to your base, it is harder than it sounds!
Be aware of double flag carriers, they can be your best friends but also your worst enemies.
One Flag CTF
1FCTF (g_gametype 6). This is another Capture the Flag variant. You basically have to pickup the Neutral Flag (White Flag) in the middle of a map and try to get to the enemy's base to score a point.
Don't forget that it's the enemy base and therefore well protected! You better get your team with you to have a bigger chance to capture.
Many maps support this gametype like q3wcp*, q3w*, q3wxs* etc. but you can also add support for other maps (for example, q3ctf1-4, see the Map Modification feature).
Clan Arena
Clan Arena gametype can be considered as an elimination gametype. It is round-based, and the principle is simple: hunt down the enemy team to win. Once you got fragged you have to wait until the round ends only then you will respawn.
It is inspired on the Rocket Arena mod.
Freeze Tag
FTAG (g_gametype 8). This is a great teamplay gametype. It is a lot like that game you may have played as a kid, but without the killing. In Freeze Tag you try to eliminate the entire enemy team.
If you kill someone then they will become frozen. So to eliminate all, you'd need to freeze everyone, making them all frozen at the same time.
This will give your team a point and the round will start over again. If you are ever frozen, a teammate can come rescue you by standing next to your icy body for three seconds. You'll then be set free and can join the battle again.
This gametype is based on Darrell Bircsak's Freeze Tag.
Protect the Leader
PTL (g_gametype 9). This one is an all-new teamplay gametype where you have to prevent that your leader gets hurt. Each team has a granted team leader who is carrying your team's flag.
The enemy team of course tries to kill your leader to win the round and it is your job to prevent this! The one who kills the leader gets the new leader and automatically is hunted by the other team.
Map Modification
Excessive Plus includes a feature to modify map entities, which can be disabled with the xp_noCustomEnts server cvar. Entities includes all the interactive elements of a map, like items, spawns, movers, teleporting targets and more. However, you can't alter the map solids with them, and even when you can modify location names or add new ones, keep in mind that all the modifications are server side, so that will either have no effect or even can actually break team overlay in client.
If the file maps/mapname.ents exists, it will override the original entities. So this file have to be complete, including jumppads, teleporters etc. To have an example, you can look at the q3ctf4.ents file included in the release.
If you want to add some items use maps/mapname.add instead.
Among the most common applications of the entities files, we have:
- Modifying a normal map to adapt it to flag gametypes. This includes both adding the flags and red/blue spawn points to it.
- Modify item placement. If item placement is also modified, that means bots can have some problems moving around the map. Also, always try to modify them for baseq3, since it is the default config, and every other config should be responsible for modifying the items by their selves.
- Add or modify player spawn points.
- Modify space maps to make the void bounce players instead of killing them.
- ... and many more.
As an example, we include the contents of the q3dm17.add file included in the release, which mostly adds support for flag gametypes to the map. As you can see, the syntax is a bit tricky, so it is advised that you only create this files by hand for easy modifications. For more complex ones, we recommend you to modify the map with a map editor instead, and to take the contents for the .ents file directly from the compiled .bsp file (you can open it with an editor like wordpad or notepad++ and search for the "worldspawn" string, since it should always be the first entity in the list).
/* Here is an example how to modify existing maps.
 *
 * This will add red/blue lights to q3dm17 on team games and flags for CTF.
 * We use a hack to add dynamic lights to the map, please note that this is
 * very limited.
 **/

// Red base (left platform)
    {
        "classname" "team_CTF_redflag"
        "origin" "-300 -850 700"
        "notfree" "1"
    }

    // red light for all team games
    {
        "classname" "func_static"
        "origin" "-300 -850 700"
        "model" "*1"
        "light" "1020"
        "color" ".004 0 0"
        "notfree" "1"
    }

    // intensivy the light for CTF games
    {
        "classname" "func_bobbing"
        "origin" "0 -850 700"
        "model" "*1"
        "light" "1000"
        "color" ".004 0 0"
        "spawnflags" "1"
        "height" "300"
        "gametype" "ctf, rtf, oneflag"
    }

    // add a white marker light where the flag should
    // be, this will help us returning the flag
    {
        "classname" "func_static"
        "origin" "-300 -850 600"
        "model" "*1"
        "light" "100"
        "color" ".004 .004 .004"
        "gametype" "rtf"
    }

// Blue base (right platform)
    {
        "classname" "team_CTF_blueflag"
        "origin" "-300 978 600"
        "notfree" "1"
    }

    // blue light for all team games
    {
        "classname" "func_static"
        "origin" "-300 978 700"
        "model" "*1"
        "light" "1020"
        "color" "0 0 .004"
        "notfree" "1"
    }

    // intensivy the light for CTF games
    {
        "classname" "func_bobbing"
        "origin" "0 978 700"
        "model" "*1"
        "light" "1000"
        "color" "0 0 .004"
        "spawnflags" "1"
        "height" "300"
        "gametype" "ctf, rtf, oneflag"
    }

    // add a white marker light where the flag should
    // be, this will help us returning the flag
    {
        "classname" "func_static"
        "origin" "-300 978 600"
        "model" "*1"
        "light" "90"
        "color" ".004 .004 .004"
        "gametype" "rtf"
    }

// Neutral flag
    {
        "classname" "team_CTF_neutralflag"
        "origin" "2432 64 372"
        "gametype" "oneflag"
    }

    // add some light, only if gametype = oneflag
    {
        "classname" "func_static"
        "origin" "2432 64 372"
        "model" "*1"
        "light" "300"
        "color" ".004 .004 .004"
        "gametype" "oneflag"
    }
    {
        "classname" "func_bobbing"
        "origin" "2432 64 372"
        "model" "*1"
        "light" "600"
        "color" ".004 .004 .004"
        "spawnflags" "2"
        "height" "300"
        "gametype" "oneflag"
    }
Rotation System
Rotation files are means to replace old quake cvar-based rotation system. To enable it, just set xp_rotation to the file your rotation script is.
If the xp_rotation cvar is empty, or the file does not exist or it's empty (there are no maps on it, even if the file is not really empty), it falls back to the default quake behavior and executes whatever it is on the nextmap cvar.
Description
In its simplest form, you can just write a list of maps that your server will keep rotating once a map finishes. For example:
// very simple rotation file
q3dm1
q3dm2
q3dm3
q3dm4
q3dm5
The first line of the script is a comment and is ignored by the parser. Everything after double slashes // and a hash mark # until the end of the line is ignored. Additionally, an slash followed by an asterisk /* indicates the start of a comment, which can be spread across multiple lines until an asterisk followed by an slash */ is found.
From the second to last line on the example we have our rotation, which is simply a list of maps. Maps are separated with a newline character, or with a semicolon ;.
Additionally, you can modify the values of server cvars inside your rotation files by adding a dollar-sign $ before the cvar name and after it the equal sign =, followed by its value, optionally enclosed by double quotes ". Also, you can execute server commands, by prefixing it with a slash / or inverted slash \, and is read until the end of the line. This is illustrated in the following example:
// global settings, will be executed always before each map
$g_gametype = 3; // team deathmatch
$timelimit =  20;
$fraglimit =  30;
$xp_config =  "excessive5.cfg"; // strings can also be assigned

// kick any bot added in the previous map
/k allbots

// actual rotation
q3dm1
q3dm2
q3dm3
To separate multiple cvars you can alternatively use semicolons ;, which allows you to assign several cvars in the same line.
All these cvars and commands will be executed before each map, which is good to ensure that your server is running the right settings all the time. However, you can also set settings and run commands specifically for one map in the rotation, if you enclose these between brackets { } immediately after a map, like the following example shows:
// this will be executed before each map
$timelimit =  20;
$fraglimit =  35;
$g_gametype = 0;

q3dm1 {
    $fraglimit = 50;
}
q3dm2
q3dm3

q3ctf1 {
    $g_gametype = 4;
    $timelimit = 15;
    $capturelimit = 10;
    /load excessive3
}

// this will be ffa! remember the "g_gametype = 0"
q3ctf4
A very common usage of map blocks is to set the g_motd cvar to the information of the next map in the rotation, and the message will be printed to clients in their loading screens:
// this will be executed before each map
$timelimit =  20;
$fraglimit =  35;
$g_gametype = 0;

q3dm1 { $g_motd = "^5Next map: ^2q3dm2" }
q3dm2 { $g_motd = "^5Next map: ^2q3dm3" }
q3dm3 { $g_motd = "^5Next map: ^2q3dm1" }
Manual rotation
By default, a map will be rotated only at the end of the map. However, you can additionally use the command /rcon rotate [step] to manually change the current map. The command accepts an optional parameter, which can be:
- A number, which will be used to rotate the map relatively to the current map. So, for example a value of 1 means rotate to the next map, a 2 to rotate two maps ahead, a -1 to rotate the the previous map and a 0 to restart the current map. If no argument is specified for the rotate command, then the value of
xp_rotateStepwill be used as the first parameter. Since a rotation is by definition cyclical, there is no problem in using any number as this parameter, even arbitrarily big ones, because for example in a 10 map rotation, the first map is also the 11th, 21th, and so on. - The restart keyword, or its shorthand, r, which will rotate to the first map in the rotation.
If you want to let your users the possibility of chose which maps to play on, you can add the rotate string to the xp_vote cvar. However, this will let the user the liberty to specify a parameter for the command. So, you can alternatively just add the nextmap string, which will just execute a /rotate command without any parameter.
Random rotation
As you could read in the latest section, the xp_rotateStep cvar controls how many maps to "jump" with a /rotate command without any parameter, which is what is used at the end of maps. You can use this cvar to modify the flow of your rotation, for example a value of -1 will mean that your rotation will run backward.
However, a more useful application for this xp_rotateStep cvar is the possibility for random rotations. To achieve that effect, just add the following line to your Crontab file:
// randomize rotation
* * * * * /execstr set xp_rotateStep $(sv_serverid)
This will change the value of the xp_rotateStep cvar to the value of the sv_serverid cvar, which is pretty much a random number that is used as the identifier for the server, and it changes every map. This allows for a true random map rotation.
Alternatively, if you want to keep your normal rotation, but let a user to callvote a random map, you can use a little quake scripting, and add the following line to the server cfg:
// cvar to hold the command to callvote a random map
/set randomMap "execstr rotate $(sv_serverid)"
The you just have to add the string vstr randomMap to the xp_vote cvar, and then the users can do /callvote "vstr randomMap".
Conditional rotation
To make server rotation even more dynamic, basic if-else structures are supported in rotation scripts. This allows you to rotate to specific maps only if a certain condition is met. To illustrate the syntax of if-else constructions, take a look at the example:
if ( $g_gametype != 3 ) { // NOT team deathmatch
    $timelimit = 15;
    $fraglimit = 50;
} else { // team deathmatch
    $timelimit = 10;
    $fraglimit = 100;
}

// just the same..
if ($g_gametype!=3) { $timelimit = 15; $fraglimit = 50; } else { $timelimit = 10; $fraglimit = 100; }

// a bit more complex?
if ( $g_gametype == 3 || $g_gametype == 8 ) { // tdm or freeze tag
    $g_quadFactor = 1;

    if ( $timelimit >= 20 ) { // 20+ minutes
        $fraglimit = 50;
    } else if ( $timelimit >= 12 ) { // 12+ minutes but less than 20
        $fraglimit = 35;
    } else { // less than 12 minutes
        $fraglimit = 25;

        $g_quadFactor = 3.5;
        /say ^1Quad Damage ^7is enabled because of the short timelimit!
    }
}
As you can see, the condition has to be of the form cvar comparison_operator value, where the operator can be one of the following:
- Is equal to
== - Is not equal to
!= - Is less than
< - Is less or equal than
<= - Is greater than
> - Is greater or equal than
>
The starting and closing brackets { } after the condition are mandatory.
The main usage of if-else constructions in rotation files, and actually the reason for its existence, is the possibility to modify the rotation and settings depending on the number of active clients on the server. For this purpose the cvar xp_activeClients exists, which holds the number of non-spectators currently playing on the server:
if ( $xp_activeClients >= 12 ) {
    // big maps, 12 clients or more
    q3dm12
    q3dm14
    q3dm15
} else if ( $xp_activeClients >= 6 ) {
    // normal maps, from 6 to 11 clients
    q3dm6
    q3dm7
    q3dm8
} else {
    // small maps, 5 clients or less
    q3dm2
    q3dm3
    q3dm5
}
You can also use conditions inside map blocks:
$g_gametype = 3;

q3dm6 {
    if ( $xp_activeClients > 6 ) { $fraglimit = 100; }
    else { $fraglimit = 50; }
}
Conditional rotation gotcha
To finalize, there is an issue to keep an eye on when using conditions inside the rotation file. To illustrate it, consider the following rotation:
q3dm6
if ( $xp_activeClients > 6 ) { q3dm13 }
q3dm8
q3dm9
It's pretty obvious what is the objective with that rotation file: to rotate to q3dm13 only if there is more than 6 clients on the server, but otherwise rotate directly to q3dm8.
However, a problem arises here, and it's because of the way the rotation works internally: it first counts the number of maps on the rotation, ignoring the maps for which the conditions are not met, and then it executes the map in turn. The effects of this are two problems:
- If we are currently playing q3dm8 with 4 people, this means we are on the second map of the rotation, but if the number increases up to 8 at the end of the map, on next map we will rotate to the third map of the rotation, which will effectively just restart q3dm8 because it is the third map of the rotation for more than 6 players.
- If we are currently playing on q3dm13 with 8 players, we are currently at the second map of the rotation, but if the number of players decreases down to 4 at the end of the map, on next map we will rotate to the third map of the rotation, which is q3dm9 for 6 players or less, jumping over q3dm8.
These problems can become worse the more we use that kind of conditions. To fix this, always include an else with the same number of maps of the original condition so that the total number of maps doesn't vary depending on the number of players. Applying this to the example, the fixed rotation would look something like the following:
q3dm6
if ( $xp_activeClients > 6 ) { q3dm13 }
else { q3dm7 }
q3dm8
q3dm9
Server Cvars & Commands
Excessive Plus has several new server cvars and commands, as well as some modifications to existing ones, which accounts for its many server side features. In this document you will find them all.
Variable list
g_redTeam, g_blueTeam
g_redTeam "^1RED", g_blueTeam "^4BLUE": Now they accept fancy font encoding, which will be drawn on the client scoreboard.
g_teamAutoJoin
g_teamAutoJoin "0": Bitmask to control automatic team joining when a player first joins to a server or on gametype changes. Available flags:- 1 - Join automatically to the team with less players or less score.
- 2 - Don't automatically join a team, but preserve the current teams across gametype changes.
refereePassword
refereePassword "": Sets the referee password. A referee is like an admin but with the advantage that the admin can restrict the commands a referee can use. You can for example allow referees to kick players but not to ban someone.Use
xp_referee to define the commands and /ref to login and execute referee commands.Use an empty password to disable referees.
roundlimit
roundlimit "0": Enables a roundbased gameplay. The match will end after X rounds were played no matter if there is a winner or not. However, if fraglimit is enabled, the game can also end if either of the teams reaches the fraglimit.This is only available if
xp_matchmode is set.
xp_activeClients
xp_activeClients: Informative cvar that holds the number of non-spectators players that are currently in the server. Very useful for writing conditional rotations, see the Rotation System documentation for further information.
xp_bans
xp_bans "bans.txt": File name of the bans script of this server. If it exists, it enables the /rcon ban server commands, and its used as the input and output file for the Bans System.Use an empty string to disable bans.
xp_chatProtection
xp_chatProtection "0": Enables the chat protection after someone chatted for X or more seconds. Setting this to 1 means that it can be abused! One can start chatting to avoid being killed.
xp_config
xp_config "conf/default.cfg": Holds the name of the current config file. It can also be used to change the config at the end of the map. For more information, refer to the Configuration System documentation.
xp_crazyCTF
xp_crazyCTF "0": Modifies the behavior of flag gametypes. When enabled, when a player touches the enemy flag, he takes it but it respawns right away, but when he is killed while holding the enemy flag, this disappears. This means that the flags will be on each base all of the time, which makes the flag gametypes to center more on capturing the flag, probably better with few players.
xp_crontab
xp_crontab "crontab.txt": File name of the crontab script of the server. For a detailed information on the format of this file, refer to the Crontab documentation.Use an empty string to disable crontab.
xp_date
xp_date: Server info cvar that holds the server binary build date, used to know if a server is fully updated.
xp_floodProtect
xp_floodProtect "1": Enables flood protection on the server, which limits the number of commands a client can send to a server (most noticeably chats) in a second to the value of X. If this cvar is enabled, sv_floodProtect should be disabled.
xp_holyshit
xp_holyshit "0": If enabled you will hear the "holyshit" sound when you kill an enemy with a direct BFG hit.
xp_improvePrediction
xp_improvePrediction "1": Tries to send information of enemies earlier to the client, reducing the problem with enemies suddenly appearing out of nowhere, easily noticeable when you are playing with high pings.
xp_inactivitySpectator
xp_inactivitySpectator "180": This one sets you automatically /away after X seconds of idle. If you join the game you will get your old score back.
xp_legacy
xp_legacy "3": Bitmask to control support for older Excessive Plus versions in the server. Available flags:- 0 - Disable legacy support
- 1 - Enable legacy version support
- 2 - Spam legacy clients with console upgrade messages every 5 min
- 4 - Spam legacy clients with centerprint upgrade messages every 5 min
xp_matchmode
xp_matchmode "0": This enables the "match mode". It will enable the following client commands: /lock, /unlock, /joinword, /invite, /timeout, /ready, /notready, /teamready. Values:- 1 - Simple Matchmode. Will just enable the matchmode commands.
- 2 - Will enable the roundlimit, with the possibility to have warmup between each rounds if enabled by config.
- 3 - Will enable roundbased gameplay. After each round you will see the scoreboard.
xp_maxMVD
xp_maxMVD "0": Number of public simultaneous multiview demo recorders in the server. A value of 0 means disabled, so only referees can record multiview demos.
xp_motd
xp_motd "motd.txt": File name which holds the message of the day that will be printed to clients when they connect to the server, or when the client explicitly requests it with the /motd client command.
xp_muteSpectators
xp_muteSpectators "0": Allows you to mute all spectators. They still can talk with other spectators but the in-game players won't see it. Referees are not affected by this setting.
xp_noCustomEnts
xp_noCustomEnts "0": Disables map modification scripts located inside the /maps directory, both .add and .ents files. For more information, refer to the Map Modification documentation.
xp_physics
xp_physics "0": Enable the excessive physics and movement control. Refer to the Configuration System documentation for a detailed description for the possible values of this bitmask.
xp_referee
xp_referee "k,kick,mute,unmute,s,status,w,whois": Additional commands the referees can use. Note, however, that the following are commands that the referee can always execute and can't be disabled:capturelimit forcejoin forceteam fraglimit g_doWarmup g_friendlyFire g_gametype g_warmup lock map map_restart nextmap ready roundlimit timein timelimit timeout unlock xp_matchmode xp_suddenDeath
xp_rotateStep
xp_rotateStep "1": Default value of the /rcon rotate command, which accounts for number of maps to "jump" to when rotating the map. Requires a working rotation, and it can be used as the base for random rotations. Refer to the Rotation System documentation for further information.
xp_rotation
xp_rotation "": Server rotation script, an empty value disables rotation and falls back to the default quake rotation. For detailed information on the rotation file syntax, refer to the Rotation System documentation.
xp_solids
xp_solids "0": Modifies the player interaction with other entities on the server. For a detailed description of this cvar, refer to the Configuration System documentation.
xp_spawnSystem
xp_spawnSystem "3": Bitmask that controls player spawning system. Available flags are:- 1 - Try to avoid spawn points close to enemy players.
- 2 - Try to avoid spawn points close to place of death.
xp_suddenDeath
xp_suddenDeath "0": Disables or enables sudden death. Sudden death is enforced if the time is over and there is no clear winner.
xp_teamBalance
xp_teamBalance "1": This will try to even out the teams after a match is over so the next game can be fair again if good players left a team, etc.
xp_unlagged
xp_unlagged "1": Enables the unlagged technology. It can be set separately for each weapon, see the Configuration System documentation for further information.
xp_userdb
xp_userdb "1": Enables the user aliases database and enables the following server commands: /rcon whois and /rcon w.
xp_validTLD
xp_validTLD "0": Don't allow the users to modify the value of their xp_country cvar, effectively disallowing faked country locations.
xp_version
xp_version: Holds the version of the Excessive Plus mod. Additionally, since it is a server info cvar, it has the filename of the current config, its name and the MD5 of it.
xp_vote
xp_vote "conf,map_restart,nextmap,map,..": This is the /callvote list. Add or remove commands you want and separate them with a "," or a ";". An empty string disables voting, but the recommended method for disabling callvoting is to disable the g_allowVote server cvar.
xp_voteconf
xp_voteconf "voteconf.txt": File name of the config voting script, which holds the names and descriptions of the allowed configs for voting when xp_vote has the conf string on it, see the Configuration System documentation for further information.
xp_voteTime
xp_voteTime "30": Adjustable vote time.
xp_warmupRespawn
xp_warmupRespawn "3": Bitmask to controls what is respawned at the end of warmup time. For the possible flags, see the Configuration System documentation.
Command list
ban
/rcon ban <id|expresion> [<reason>], alias /rcon b: This command will add a ban to the bans.txt. You can use wildcard matches to ban whole list of players and additionally give a reason for the ban.By default, this command bans a player by name, IP and GUID with a single call. However, if you just want to ban an user for a single one of them, you can use
/rcon banname, /rcon banip or /rcon banguid respectively, all of which share the same syntax as /rcon ban.Examples:
/rcon ban 2
/rcon ban "A*" "guys with a starting 'A' are out!"
centerprint, cp
/rcon centerprint <message>, alias /rcon cp: This lets you display a big message to the screen of all players. Clients can disable printing of this messages by disabling cg_centerTime.
cmd2
/rcon cmd2 <cvarname> [<arg1> ...: Executes the string contained in the cvar specified with all the occurrences of $(X) (where X is a number) replaced with the passed parameters, which effectively allows you to simulate custom "commands". Additionally, any server command of the form /rcon =cvarname [...] will be expanded to /rcon cmd2 cvarname [...] on execution. Example:
// first put the command in the cvar, the following will
// modify sv_pure to the first parameter and restart the map right after
/rcon set set_pure "sv_pure $(1); map_restart"

// now execute the custom "command"
/rcon cmd2 set_pure 1
// which is the same as
/rcon =set_pure 1

// add the "command" to the referee commands
/rcon xp_referee "=set_pure"
// now execute it with /ref
/ref =set_pure 1

// now add it to vote commands
/rcon xp_vote "=set_pure"
// now you can /callvote it
/callvote =set_pure 1
execstr
/rcon execstr <command>: Executes the given command with every occurrence of $(cvarname) replaced with the value of the given cvar, for example:// displays a message with number of playing clients /rcon execstr say ^5There are currently $(xp_activeClients) active clients on the server! // displays the name of the host to clients /rcon execstr say ^5You are playing on $(sv_hostname)! // adds kick to list of referee commands /rcon execstr set xp_referee kick,$(xp_referee)
forcejoin
/rcon forcejoin <id|name> <"red"|"blue"|"none">: When teams are locked, use this command to invite a player to spectate the given team, and also to be able to join later. If, however, "none" is passed as the team name, it will remove him from any team he was already invited.This is only available if
xp_matchmode is set.
forceteam
/rcon forceteam <id|expression|"all"|"allbots"> <"free"|"red"|"blue"|"spec"|"away">: Forces a client to join an specific team. You can use wildcards to match group of clients, or also the keywords "allbots" and "all". If the team you want to set for a client is locked, the client must be already invited to it. If he's not, use /rcon forcejoin on the client first.
ipdb
/rcon ipdb <ip_address>: This is just a raw access to the IP-to-Country database. Can be used to check the origin of IP addresses.
kick2, k
/rcon kick2 <id|expresion|"all"|"allbots"> [<reason>], alias /rcon k: This is an advanced /rcon kick and /rcon clientkick in one command. You can use wildcard matches to kick a whole list of players and additionally give a reason for the kick. Examples:/rcon k 2 /rcon k "A*" "guys with a starting 'A' are out!" /rcon k all "I want to empty my server!" /rcon k allbots
load
/rcon load <config>: Loads a specific configuration. Read the Configuration System documentation for further information. Example: /rcon load excessive5.
lock
/rcon lock <"red"|"blue"|"all">: Locks the specified team with a random generated password (or both if "all" is used), so clients can't join the team nor spectate its members, and also to lock it's free-fly view, unless the players explicitly /invite him.This is only available if
xp_matchmode is set.
motd
/rcon motd <id|"all"> [<motd_file>]: Displays the contents of the specified file (or the one in the xp_motd cvar if omitted) as a motd command for the specified client (or to everyone is "all" is used).
mute
/rcon mute <id|name>: Mutes the given player. A muted player will not be able to chat with other players, except by using private messages (/tell).
rotate
/rcon rotate <step|"restart">: Manual rotating command, if no argument is supplied it will use xp_rotateStep as its value. If instead "restart" is passed, it will rotate to the first map of the rotation. Read the Rotation System documentation for further details.Server admins should be used to
/rcon vstr nextmap to rotate maps. However this does not work for the new rotation system!You have to use
/rcon rotate instead, this also works for old rotation. In general just use /rcon rotate instead of /rcon vstr nextmap in Excessive Plus.
says
/rcon says <message>: Broadcast a message to all players. The message will be prepended with "server:", instead of "console:" for /rcon say, which is handled by the engine. Now since miss-typed commands are only echoed back to the rcon user, he must explicitely use /rcon say or /rcon says to communicate with players.
status2, s
/rcon status2, alias /rcon s: This is an advanced /rcon status and will show you the ID, IP address and GUID of the players on the server.
timein, ready
/rcon timein, alias /rcon ready: Ends the current taken timeout by setting all clients to ready status.
timeout
/rcon timeout: Timeouts the game for either 120 seconds (team gametypes) or 60 seconds (tournament). To end the timeout, the clients can use /ready or /teamready.
unlock
/rcon unlock <"red"|"blue"|"all">: Unlocks a previously locked team, or both if "all" is used.
unmute
/rcon unmute <id|name>: Allows a muted player to chat again.
vote
/rcon vote <"yes"|"no">: Forces a vote to either pass through ("yes") or to fail ("no").
w
/rcon w: Queries the user aliases database (userdb) and lists the top 3 aliases for all the current players of the server. Please note that the userdb uses client GUIDs as the identifier for the client, so if the client changes his CD key then the aliases won't be found.This is only available if
xp_userdb is set.
whois, who
/rcon whois <id>, alias /rcon who: Queries the user aliases database (userdb) and lists the top 10 aliases used by the client being queried.This is only available if
xp_userdb is set. Server-Side Only
Excessive Plus is fully compatible to be played without any client-side modifications. That also means that your server will be more popular and filled with new gamers because they don't need to download anything to play on a Excessive Plus server.
Use the /players command to see who is playing with/without the client-side modification: players without the mod are marked with a red asterisk, and even further, players with older Excessive Plus versions are marked with a yellow asterisk.
But nevertheless it's very recommended to play it with the client-side modifications, specially on servers that use non-baseq3 physics or modified weapons times, so the settings can be predicted properly and the gaming experience is better. Additionally, the client modifications include several useful features of its own.
Team
The ever first version, of what now is Excessive Plus, started in the late 2001. It was called "NOT Mr. Pants Excessive", maybe you actually played it because it used "Excessive" as the gamename but was never released.
Excessive Plus Team
easy
beast
edy (inactive)
spider (inactive)
term (inactive)
cid (inactive)
Credits
The biggest thanks goes of course to Dan 'Mr. Pants' Schoenblum who created the original Excessive Overkill modification for Quake III Arena. It was the inspiration for this modification.
Management
easy
beast
edy
Programming
easy
beast
panda
cid (inactive)
Operations/Support
edy
Pure Imaginary
dyna
Protect the Leader Design
Xavier 'aVe' Lardy
Special Thanks To
Pure Imaginary
mullder
PeTe
conker
ShYtEd
MoWLy
wieSel
Satan
mouse
Camel and all other beta testers
Resources
Darrell Bircsak - Freeze Tag
Paul Jordan - ZCam
Neil Toronto - Unlagged
Sven Jacobs - Radio Mod
Q3F Team - Media
CPMA Team - Media
IP-to-Country Database
Richard Hipp - SQLite
Jeroen C. Kessels - GOLD Engine
Joey Brosovich - Media
Broken - HUDs
And of course a special thanks to ID Software for producing the greatest FPS games and providing us with tools to enhance them even further.
API
A small reference to the APIs of this website.
Under construction.
Fancy Quake Tags
Under construction.
A bit delayed for the new font.
In meanwhile take a look at open source fancy fonts by Camel-XP
http://aim-plus.com/article.php?id=23
get the source file here: link
Server Spider
Under construction.
Here is an sample class to access the Server Spider data.
Use the following PHP code to display a list of all available servers.
example_list.php
<?php

// css style
print('<style type="text/css">
	body {
		color: silver;
		background: black;
	}

	/* quake colors */
	.q3-black { color: gray }
	.q3-red { color: red }
	.q3-green { color: lime }
	.q3-yellow { color: yellow }
	.q3-blue { color: blue }
	.q3-cyan { color: cyan }
	.q3-pink { color: fuchsia }
	.q3-white { color: white }
</style>');

// init
require('spider.class.php');

$spider = new spider();

// display time of last cache
printf('<p>Cache date: %s</p>',
	date('r', $spider->cache_time));

// display internal structure of cache array
printf('<p>Data structure: <pre>%s</pre></p>',
	htmlentities(print_r(current($spider->cache), true)));

// access a specific server
printf('<p>Server BEER.FREEZER is %s</p>',
	isset($spider->cache['193.200.57.36:27960']) ? 'online' : 'offline');

// output all servers
foreach ( $spider->cache as $server ) {
	printf('<p>%s %d/%d(%d) <b>%s</b> %dms %s</p>',
		$server['host'],
		$server['clients'], $server['clients_max'], $server['clients_bot'],
		$server['map'], $server['ping'], $server['name']);
}
If you need to query and display a single server.
example_query.php
<?php

// init
require('spider.class.php');

$spider = new spider();

if ( $query = $spider->query('193.200.57.36:27960') ) {
	foreach ( $query['cvars'] as $cvar ) {
		// do not display our private cvars
		if ( !isset($cvar['key']) ) {
			continue;
		}

		printf('<strong>%s</strong>: %s<br />',
			htmlentities($cvar['key']), htmlentities($cvar['value']));
	}

	// there are some private cvars available: ping, map_time, map_status, score_red, score_blue
	printf('<p>Ping: %dms</p>', $query['cvars']['ping']['value']);

	printf('<p>Red score: %d<br />Blue score: %d</p>',
		$query['cvars']['score_red']['value'],
		$query['cvars']['score_blue']['value']);

	// player list
	$teams = array('Free', 'Red', 'Blue', 'Spec');

	foreach ( $query['players'] as $player ) {
		printf('<p>Name: %s<br />TLD: %s<br />Score: %d<br />Ping: %dms<br />Team: %s<br />Frozen: %s</p>',
			$player['name'],
			$player['tld'],
			$player['score'],
			$player['ping'],
			$teams[ $player['team'] ],
			$player['flags'] & SPIDER_PLAYER_FROZEN ? 'yes' : 'no');
	}
}
else {
	print('<p>Server is offline</p>');
}
spider.class.php
<?php

define('SPIDER_VERSION',				1.0);

define('SPIDER_PLAYER_FROZEN',			4);
define('SPIDER_PLAYER_RED_FLAG',		8);
define('SPIDER_PLAYER_BLUE_FLAG',		16);
define('SPIDER_PLAYER_NEUTRAL_FLAG',	32);

// php5 class
class spider {
	// settings start
	private		$url = 'http://www.excessiveplus.net/api/spider/getservers.csv';
	private		$cache_file = 'spider.db';
	private		$cache_timeout = 60;
	// settings end

	public		$cache = array();
	public		$cache_time = 0;

	function __construct( $filename = false ) {
		if ( $filename !== false ) {
			$this->cache_file = $filename;
		}

		$this->update_cache();
	}

	function sort_server( $server1 = NULL, $server2 = NULL ) {
		if ( $server1 === NULL || $server2 === NULL ) {
			return uasort($this->cache, array($this, 'sort_server'));
		}

		// sort by players, desc
		$result = -1 * bccomp($server1['clients'] - $server1['clients_bot'], $server2['clients'] - $server2['clients_bot']);

		// sort by clients, desc
		if ( !$result ) {
			$result = -1 * bccomp($server1['clients'], $server2['clients']);
		}

		// sort by ping, asc
		if ( !$result ) {
			$result = bccomp($server1['ping'], $server2['ping']);
		}

		return $result;
	}

	function load_cache() {
		if ( file_exists($this->cache_file) ) {
			$this->cache = unserialize(file_get_contents($this->cache_file));

			return true;
		}

		return false;
	}

	function update_cache() {
		if ( !is_writable($this->cache_file) ) {
			trigger_error('Cache file is not writable: '. $this->cache_file, E_USER_ERROR);
		}

		// use our cache until it timeout
		$this->cache_time = @filemtime($this->cache_file);

		if ( $this->cache_timeout >= time() - $this->cache_time ) {
			$this->load_cache();

			return false;
		}

		// try to update
		if ( $fp = @fopen($this->url, 'r') ) {
			$version = fgetcsv($fp);

			if ( $version[0] == 'spider' ) {
				if ( $version[1] != 100 ) {
					trigger_error('Server spider protocol does not match', E_USER_ERROR);
				}

				$header = fgetcsv($fp);

				while ( $line = fgetcsv($fp) ) {
					$server = array_combine($header, $line);
					$server['name_plain'] = strip_tags($server['name']);

					$this->cache[ $server['host'] ] = $server;
				}

				fclose($fp);

				$this->sort_server();
				file_put_contents($this->cache_file, serialize($this->cache));

				return true;
			}
		}

		// service is down, issue a notice and use the cache
		trigger_error('Could not update the server spider cache');
		$this->load_cache();

		return false;
	}

	// functions to query a single server
	function sort_player( &$player1 = NULL, $player2 = NULL ) {
		if ( $player2 === NULL ) {
			return uasort($player1, array($this, 'sort_player'));
		}

		// sort by team, asc
		$result = bccomp($player1['team'], $player2['team']);

		// sort by score, desc
		if ( !$result ) {
			$result = -1 * bccomp($player1['score'], $player2['score']);
		}

		return $result;
	}

	function query( $host, $timeout = 500 ) {
		list($host, $port) = explode(':', $host);

		if ( !$port ) {
			$port = 27960;
		}

		if ( $fp = @fsockopen('udp://'. $host, $port, $errno, $errstr, $timeout / 1000) ) {
			stream_set_timeout($fp, 0, $timeout * 1000);

			fwrite($fp, "\xFF\xFF\xFF\xFFgetstatus\n");

			$ping = microtime(true);

			if ( !fgets($fp, 20) ) {
				fclose($fp);

				return false;
			}

			$ping = (microtime(true) - $ping) * 1000;

			// non blocking from here on, we've already got the response
			stream_set_blocking($fp, false);

			$info = fgets($fp);
			$players = array();

			while ( $player = fgetcsv($fp, 1024, ' ', '"') ) {
				$players[] = array(
					'name' => $player[2],
					'score' => $player[0],
					'ping' => $player[1]
				);
			}

			fclose($fp);

			// parse server info cvars
			if ( preg_match_all('/\\\\([^\\\\]+)\\\\([^\\\\]+)/', $info, $matches, PREG_SET_ORDER) ) {
				foreach ( $matches as $match ) {
					$key = strtolower($match[1]);

					$cvars[$key] = array(
						'key' => $match[1],
						'value' => $match[2]
					);
				}

				ksort($cvars);
			}

			// server ping
			$cvars['ping']['value'] = $ping;

			// parse Excessive Plus compressed info
			if ( isset($cvars['info']) && ($matches = explode("\t", $cvars['info']['value'])) ) {
				$i = 0;

				// map info
				$cvars['map_time']['value'] = $this->unpack_int($matches[$i++]);
				$cvars['map_status']['value'] = $this->unpack_int($matches[$i++]);

				// team info
				if ( $cvars['g_gametype']['value'] >= 3 ) {
					$match = explode(' ', $matches[$i++]);

					$cvars['score_red']['value'] = $this->unpack_int($match[0]);
					$cvars['score_blue']['value'] = $this->unpack_int($match[1]);
				}

				// player team + flags
				$info_flags = explode(' ', $matches[$i++]);
				@array_pop($info_flags);

				foreach ( (array)$info_flags as $id => $info_flag ) {
					$info_flag = $this->unpack_int($info_flag);

					$info_team = $info_flag & ~(4 | 8 | 16 | 32);
					$info_flag -= $info_team;

					$players[$id]['team'] = $info_team;
					$players[$id]['flags'] = $info_flag;
				}

				// player tld
				$info_tlds = explode(' ', $matches[$i++]);
				@array_pop($info_tlds);

				foreach ( (array)$info_tlds as $id => $info_tld ) {
					$players[$id]['tld'] = strtolower($info_tld);
				}

				// player time
				$info_times = explode(' ', $matches[$i++]);
				@array_pop($info_times);

				foreach ( (array)$info_times as $id => $info_time ) {
					$players[$id]['time'] = $this->unpack_int($info_time);
				}

				// unset the cvar, it does not contain any "human readable" information
				unset($cvars['info']);
			}

			$this->sort_player($players);

			return array('cvars' => $cvars, 'players' => $players);
		}

		return false;
	}

	function unpack_int( $packed_int ) {
		static	$chars = "0123456789abcdefghijklmnopqrstuvwxyzABCDEFGHIJKLMNOPQRSTUVWXYZ!#$&()*+,-./:<=>?@[]^_{|}\x01\x02\x03\x04\x05\x06\x07\x08\x09\x0b\x0c\x0e\x0f\x10\x11\x12\x13\x14\x15\x16\x17\x18\x19\x1a\x1b\x1c\x1d\x1e\x1f";

		$len = strlen($packed_int) - 1;
		$result = 0;

		for ( $i = 0; $i <= $len; $i++ ) {
			$result += strpos($chars, $packed_int[$i]) * pow(62, $len - $i);
		}

		return $result;
	}
}